Find its way around
Who you are, your workspaces, projects, folders and canvases, members and tags.

over MCP
Klyaksa has its own MCP server. Connect it to Claude, ChatGPT, Grok, Cursor, VS Code, Codex or another agent — and the agent creates canvases and draws diagrams for you from a description, while you and your team edit them together in the browser.
The Klyaksa MCP address — the same for every way of connecting:
https://mcp.klyaksa.app/mcp
Transport — Streamable HTTP. Paste the address as is, with no trailing slash.
Klyaksa is free* * For large teams, separate plans may appear in the future.
Who you are, your workspaces, projects, folders and canvases, members and tags.
A whole diagram in one call: shapes, text, arrows bound to shapes. Elements from the built-in library and images.
Find elements by text or by area, describe the scene, count elements, take a screenshot of the canvas, check the layout.
Move, resize, rotate and flip, align and distribute, group, lock, duplicate, change the layer order, use frames, delete.
Save a version, list and open versions, roll back to one of them.
Create, rename and move projects, folders and canvases; archive and restore projects and canvases; manage workspaces and tags.
Invite people by email, add members, change roles, manage invitations.
Create, change and revoke share links, see link stats and visitors.
The server deletes a project, canvas or workspace only when the agent explicitly confirms the deletion. API keys, password and email, ownership transfer and leaving a workspace or project are not available to agents — only in the Klyaksa interface.
For apps and sites: Claude (the app and claude.ai), ChatGPT (the app and Codex), ChatGPT Classic, Grok (grok.com) and any other app that speaks MCP.
No key is needed: the app opens the Klyaksa sign-in itself, you allow access — and the agent is connected.
A connected app is listed in Klyaksa under AI Agents → Apps and sites → Connected applications; you can revoke it there.
Apps and sites →For agents with a config file — Claude Code, Codex, Cursor, Cline, VS Code, Kimi, Grok CLI. The key goes into the file and stays on your machine.
The agent sends the key in the X-Api-Key header.
Where to get it: in Klyaksa, the AI Agents button in the top bar → the CLI and editors tab.
CLI and editors →Pick your app and we will show the steps. No key is needed — the app opens the Klyaksa sign-in itself.
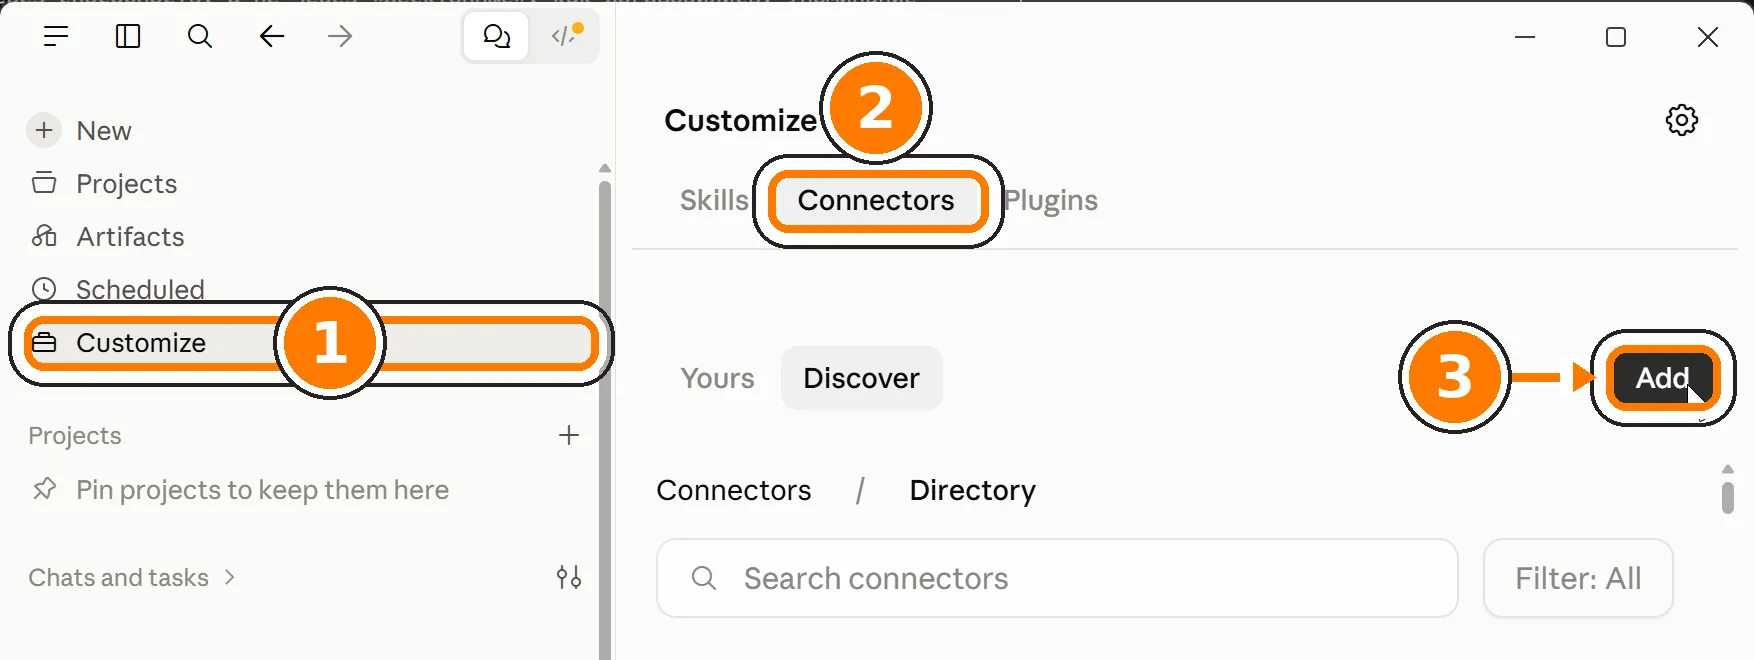
Klyaksa, address — the one above, with no trailing slash.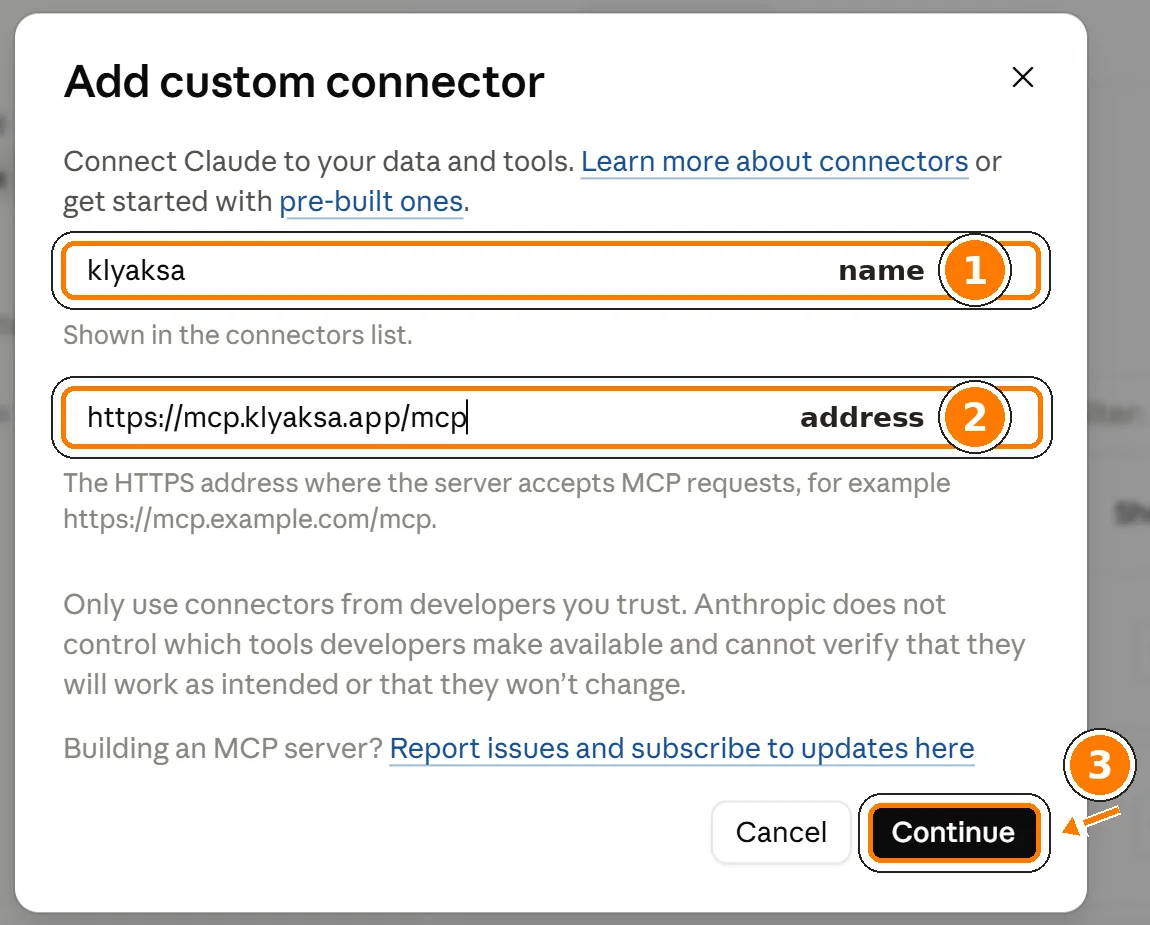
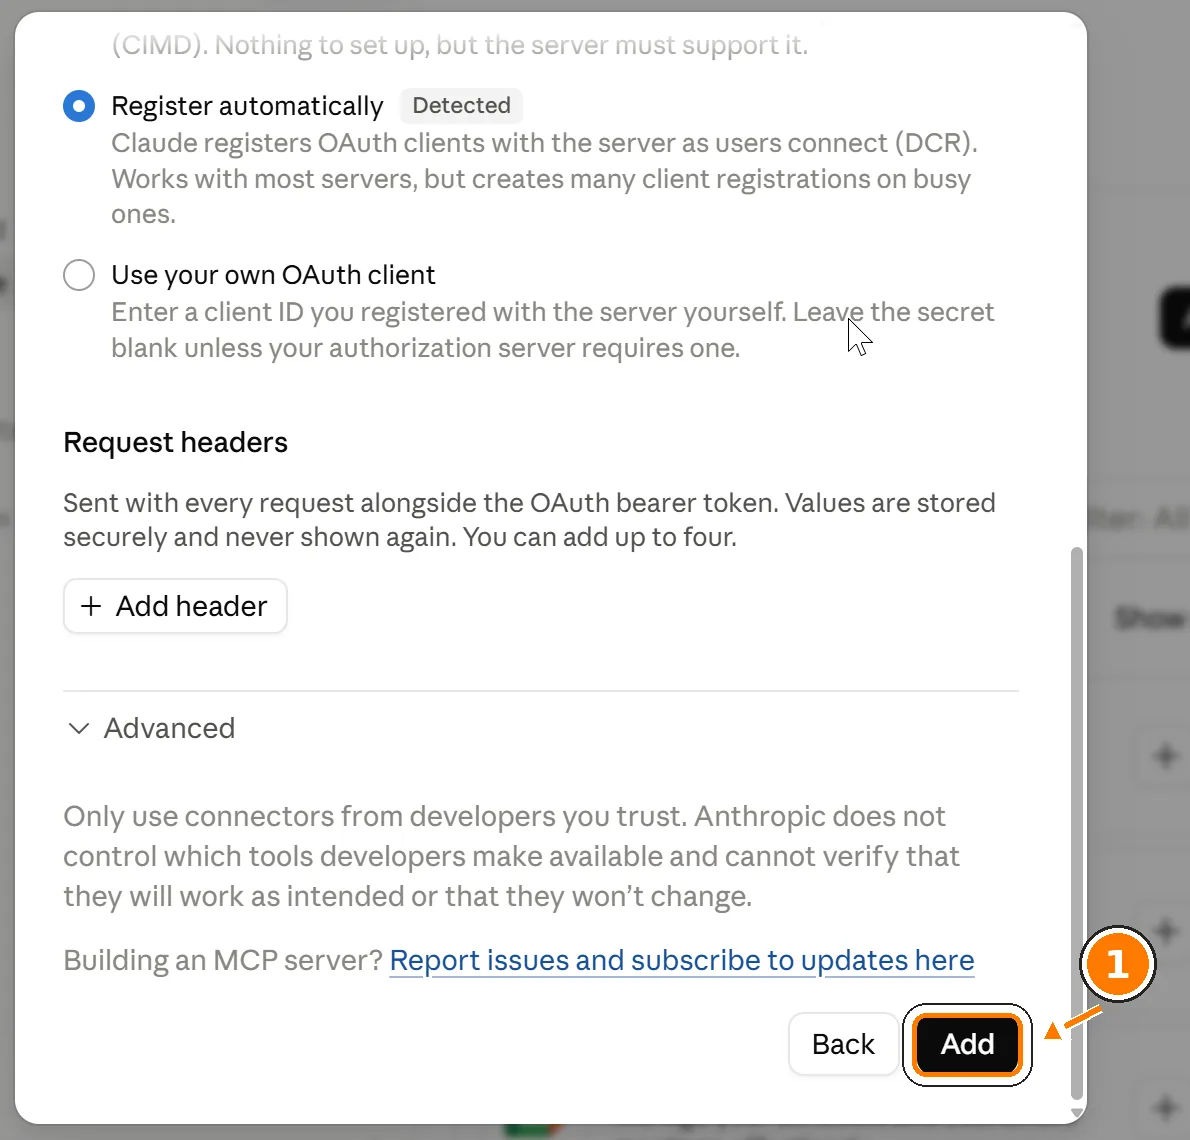
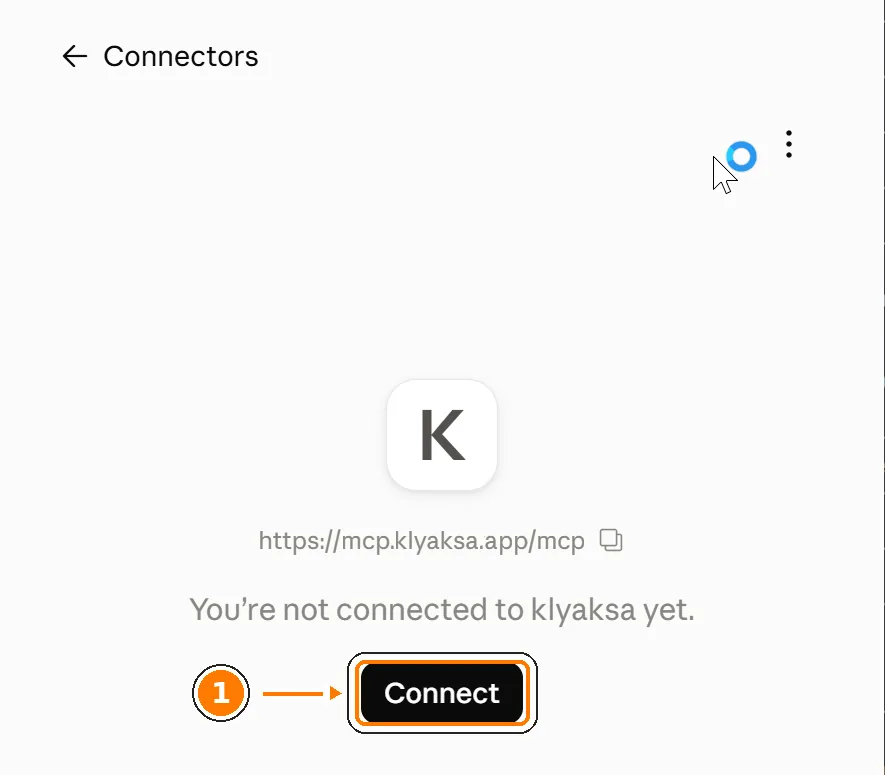
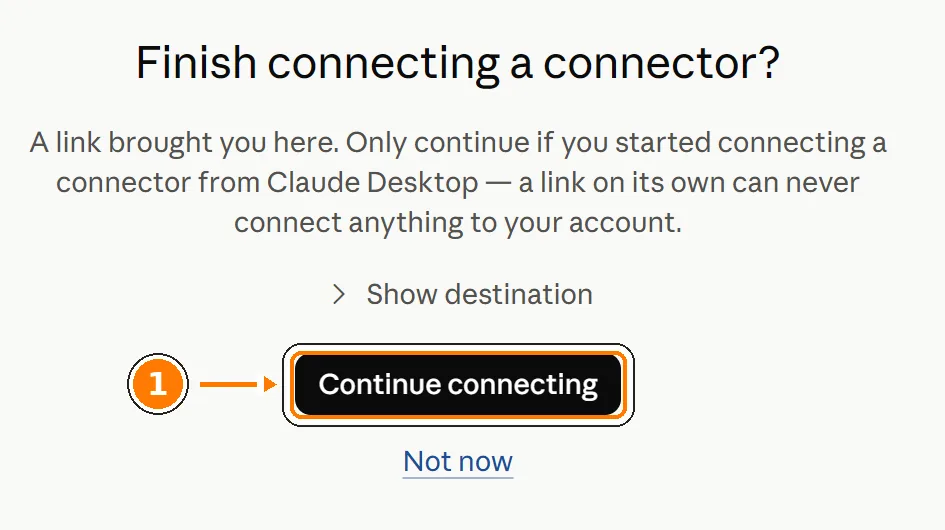
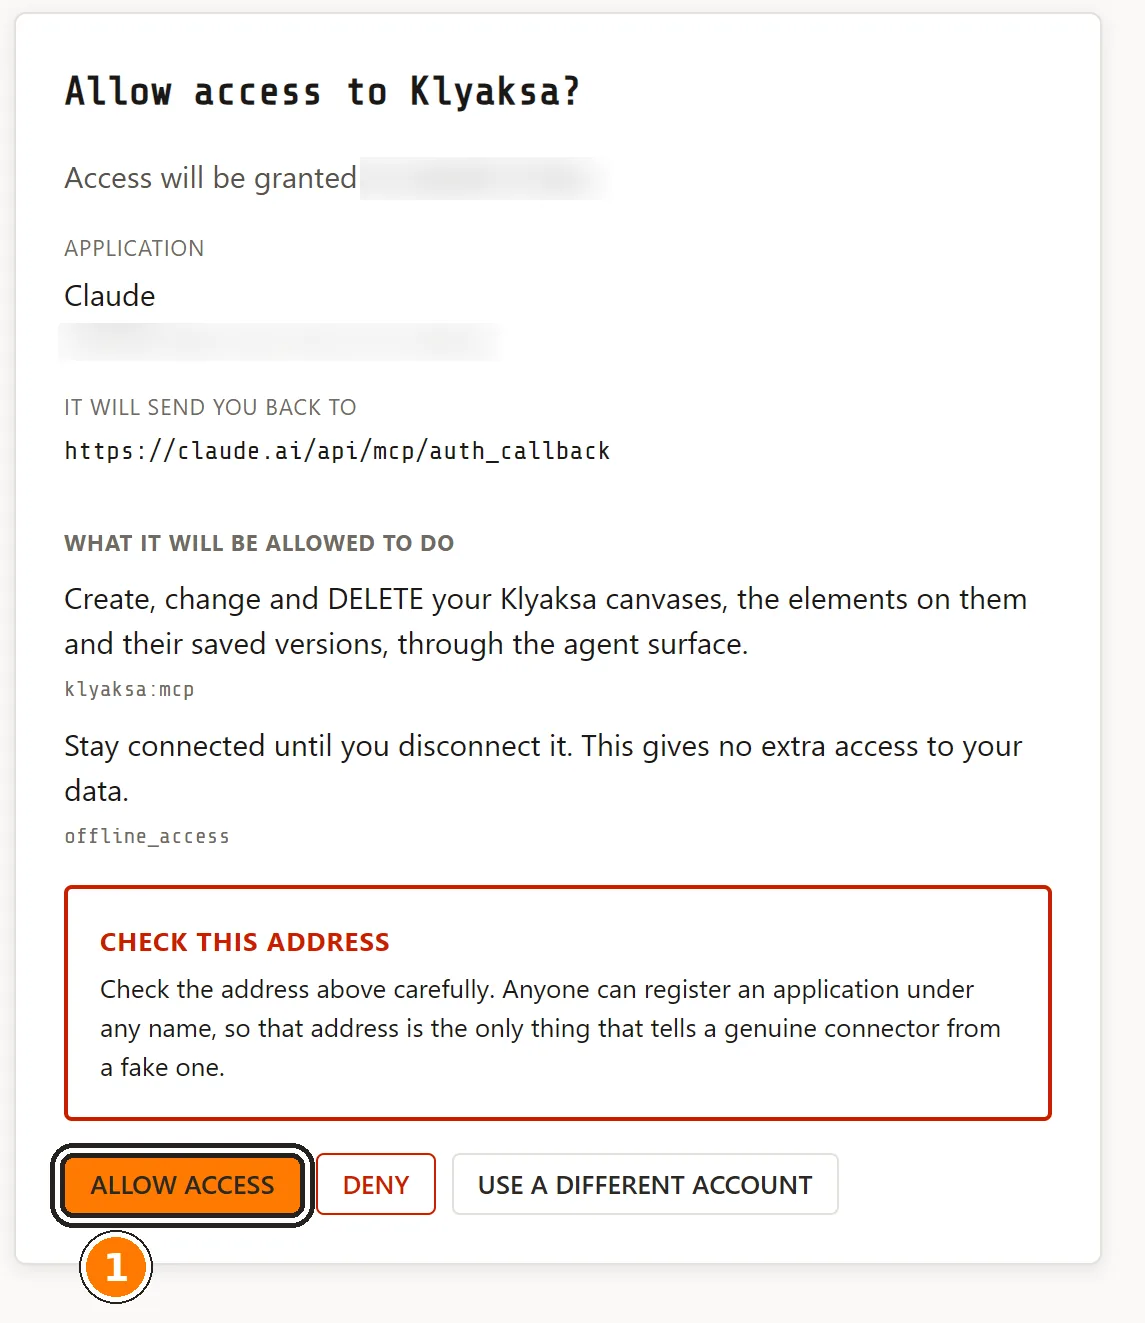
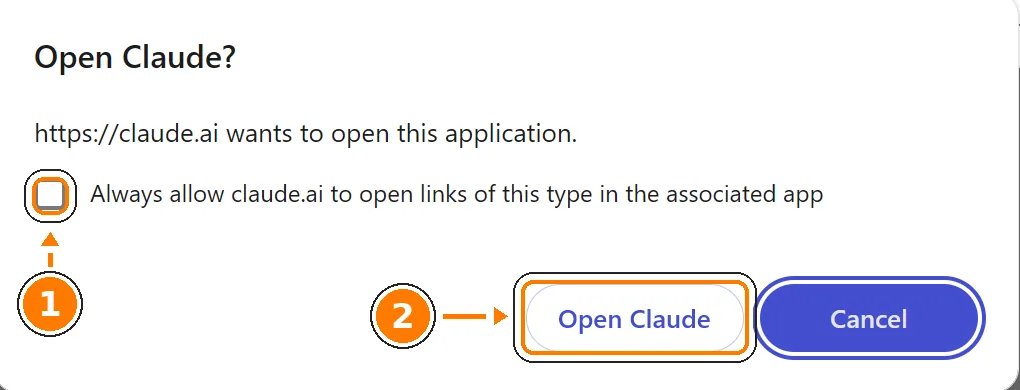
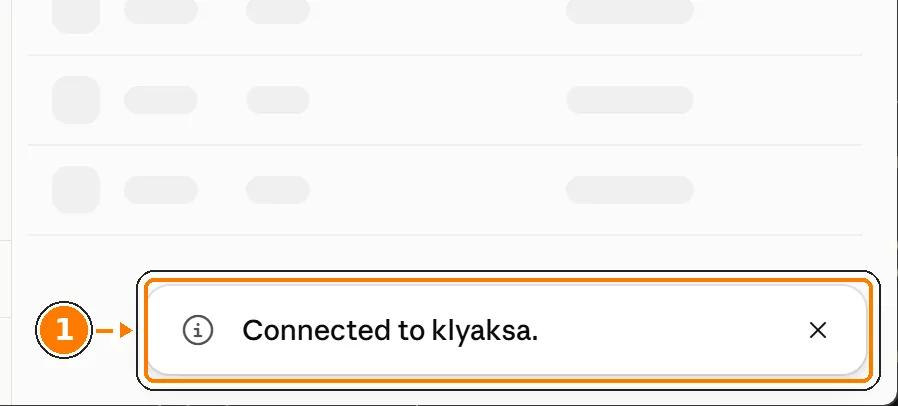
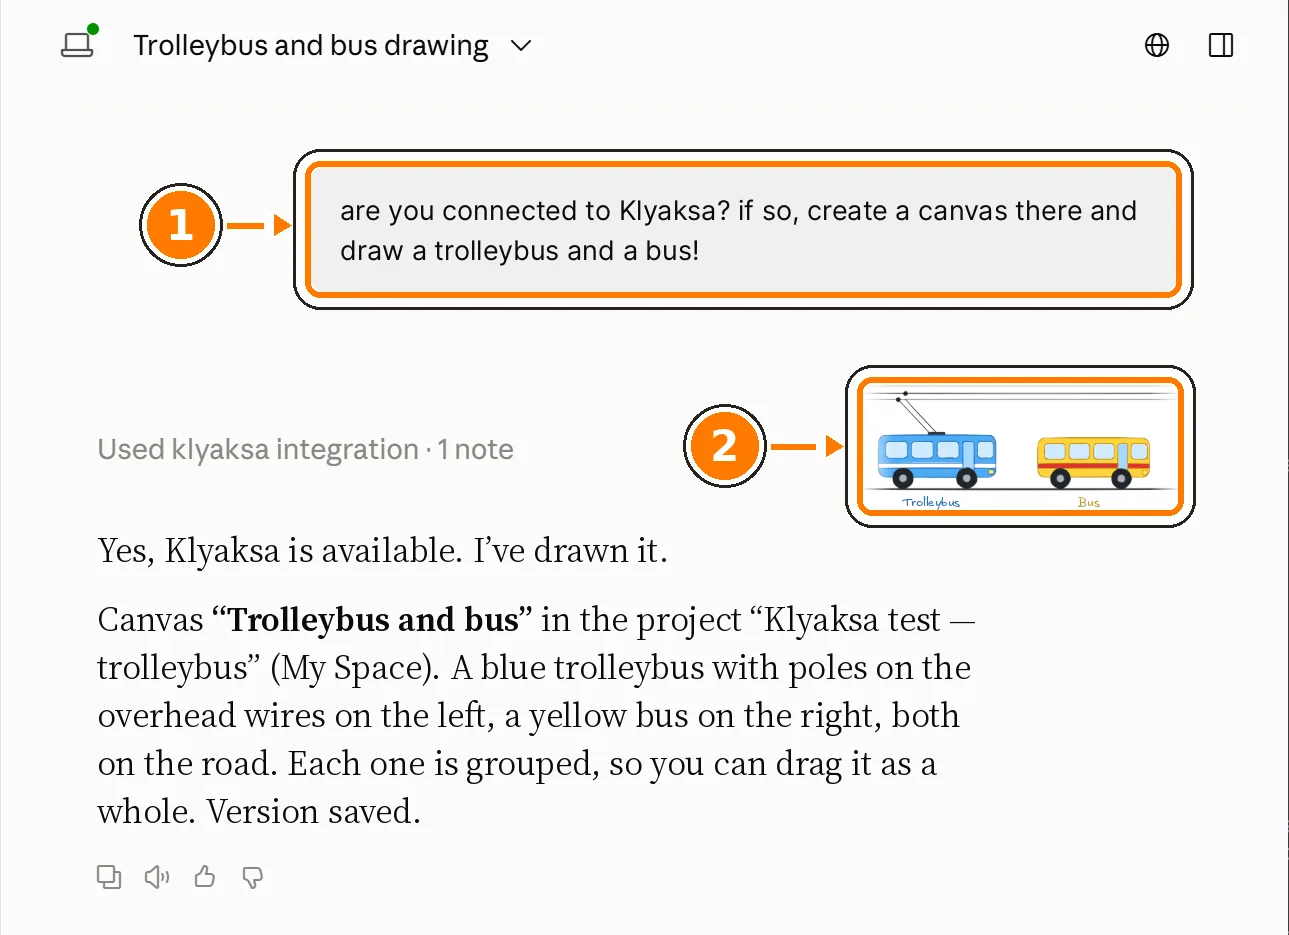
The connection is kept in your Claude account — the same connector shows up on claude.ai as well. You can disconnect it from either place.
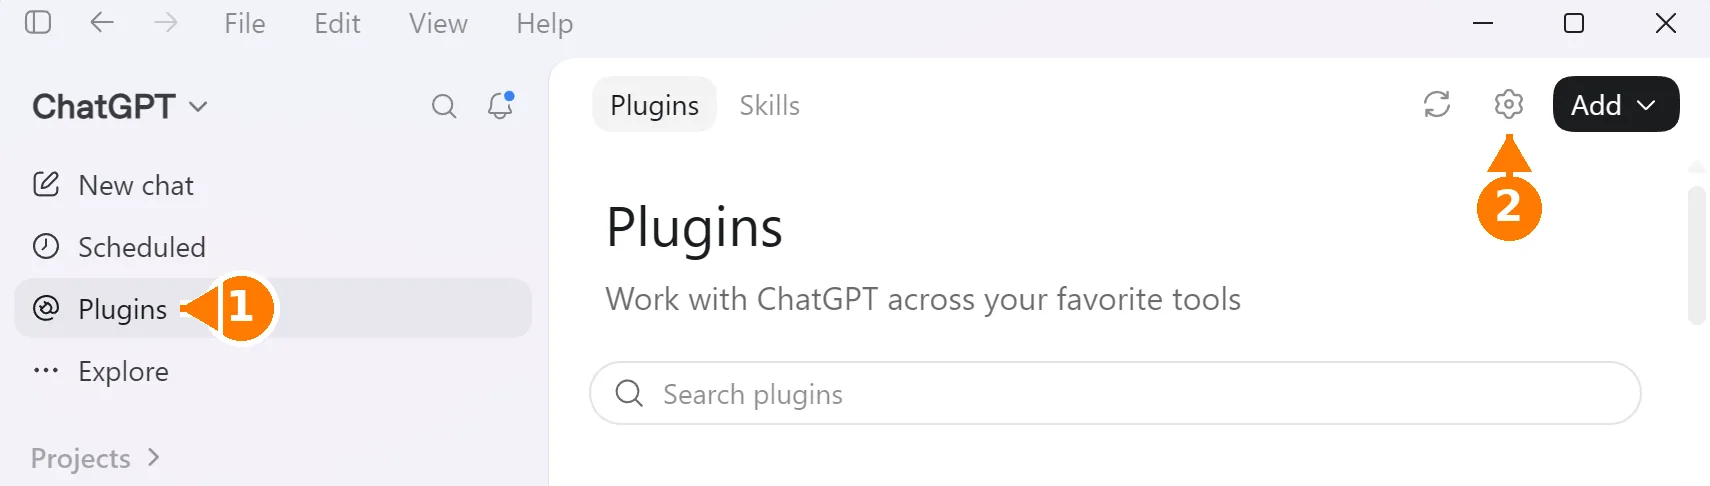
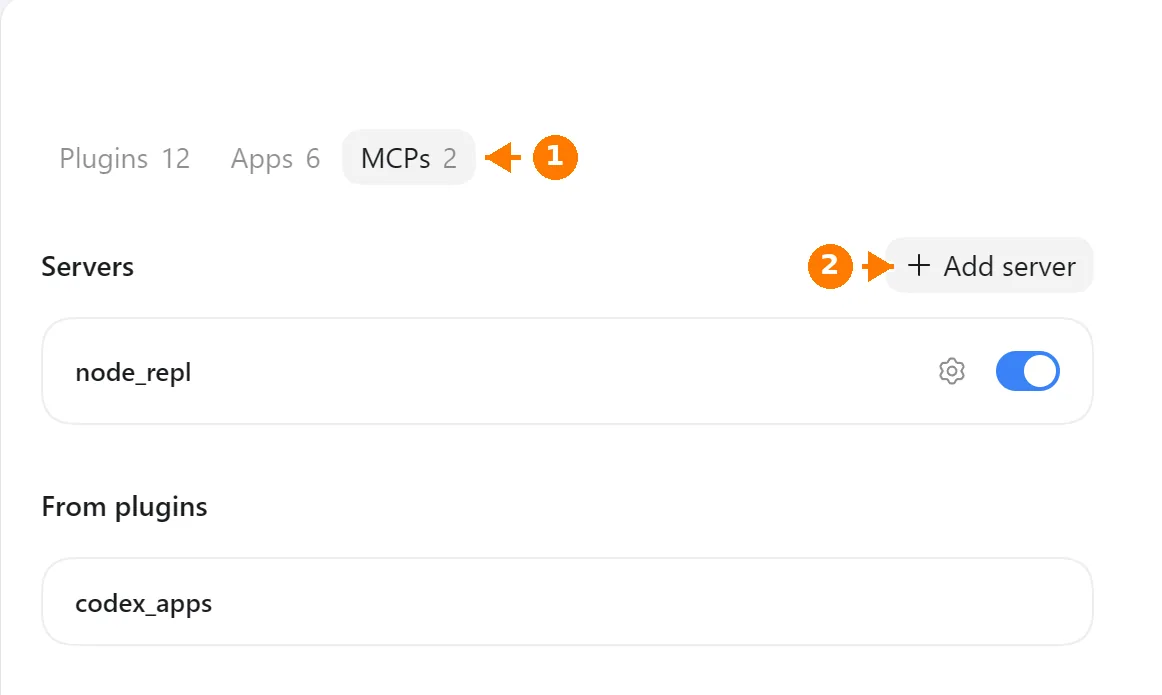
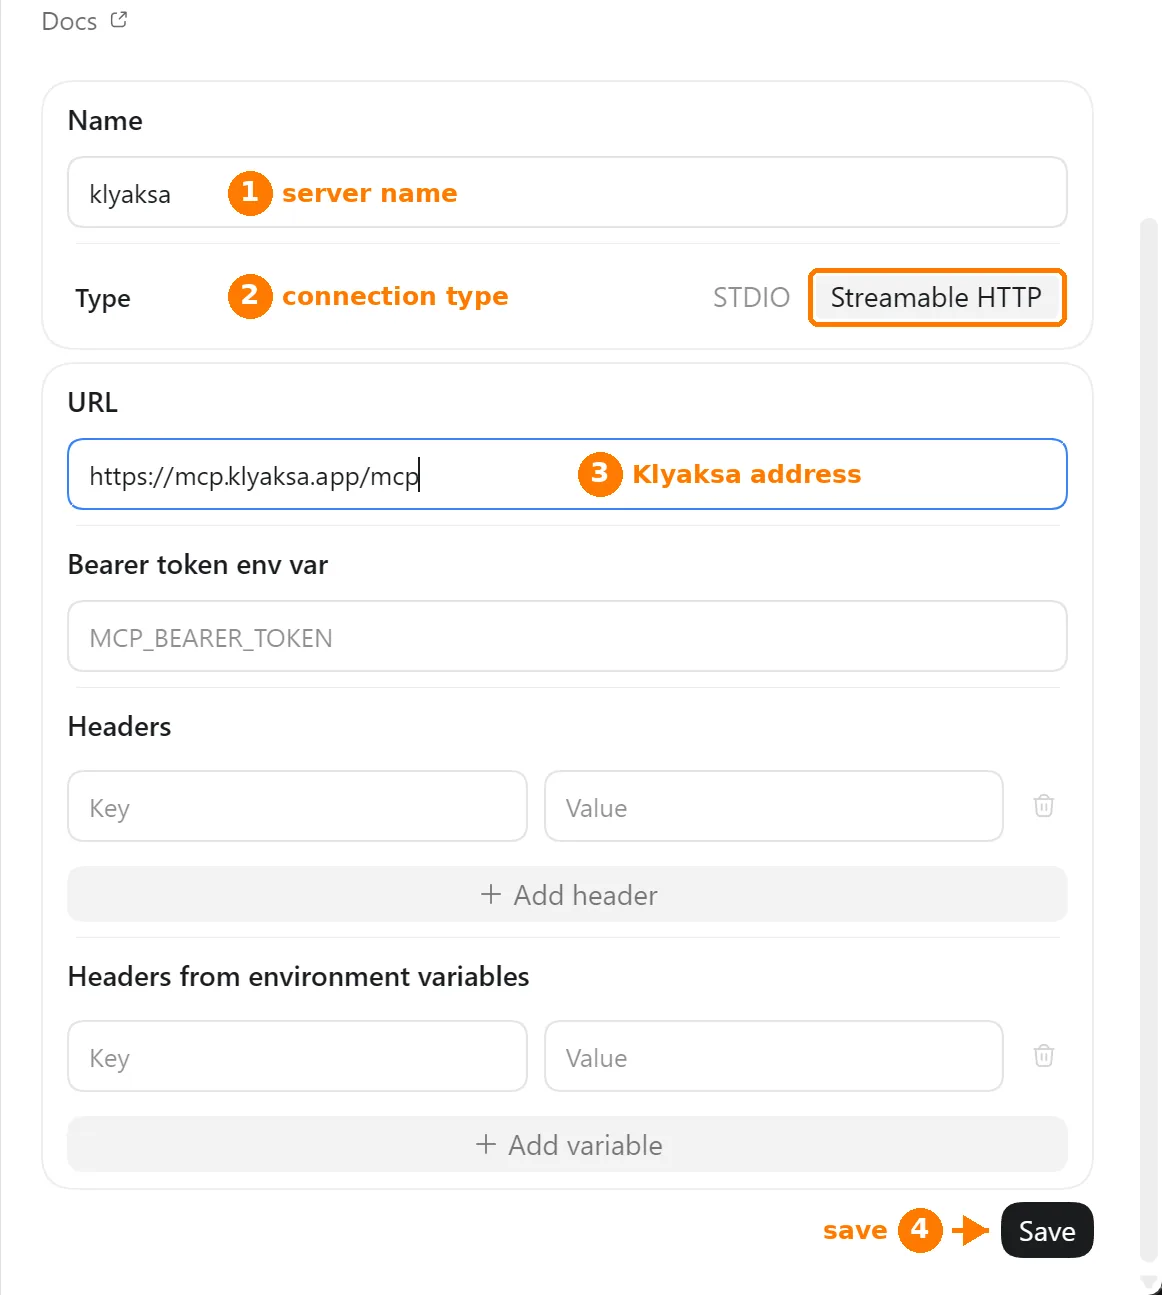
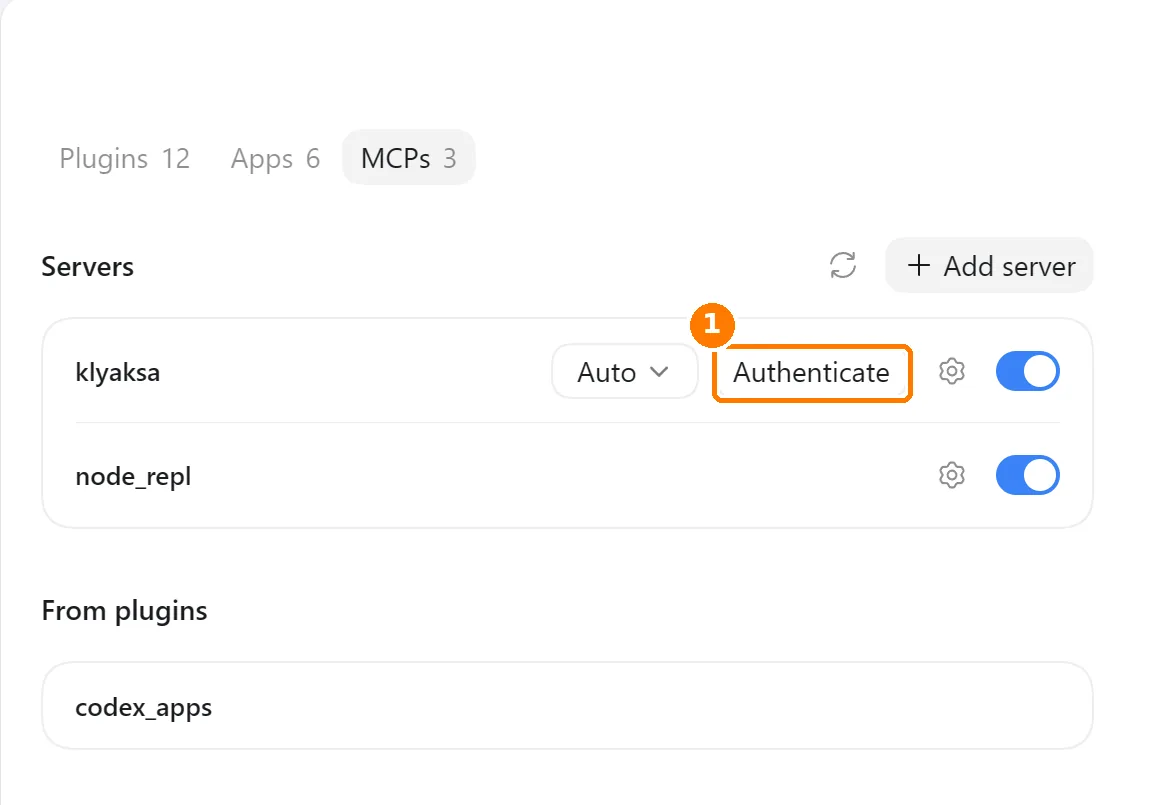
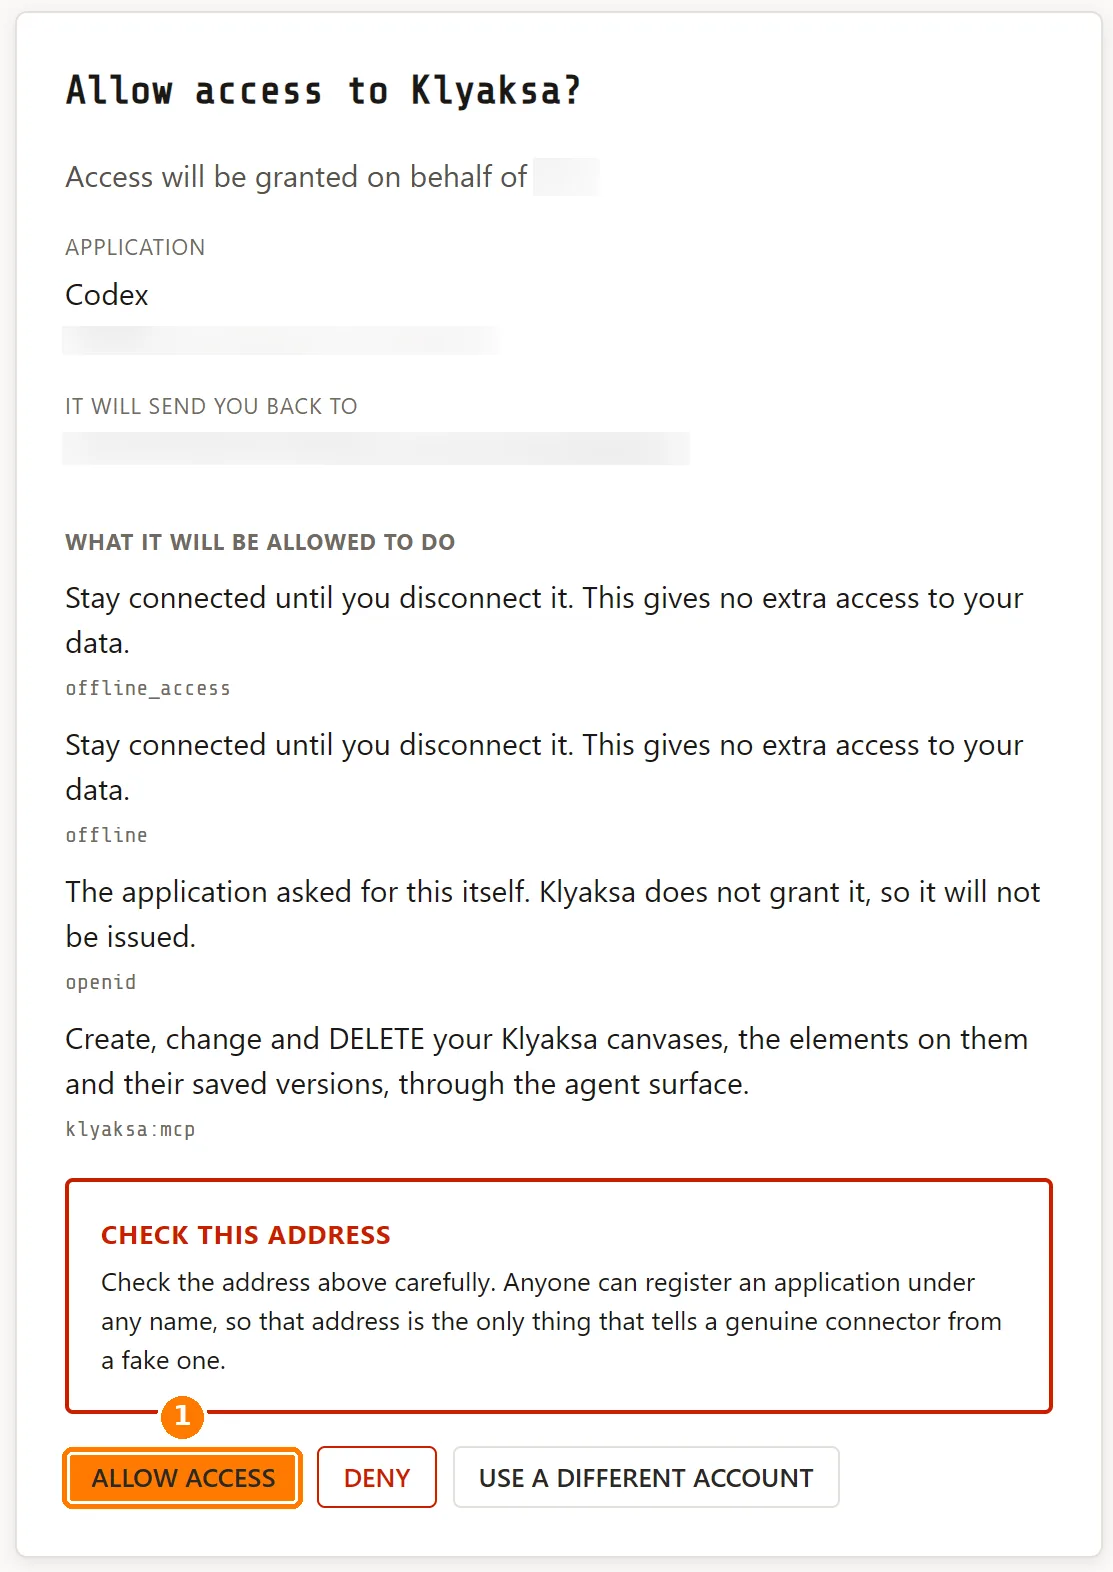
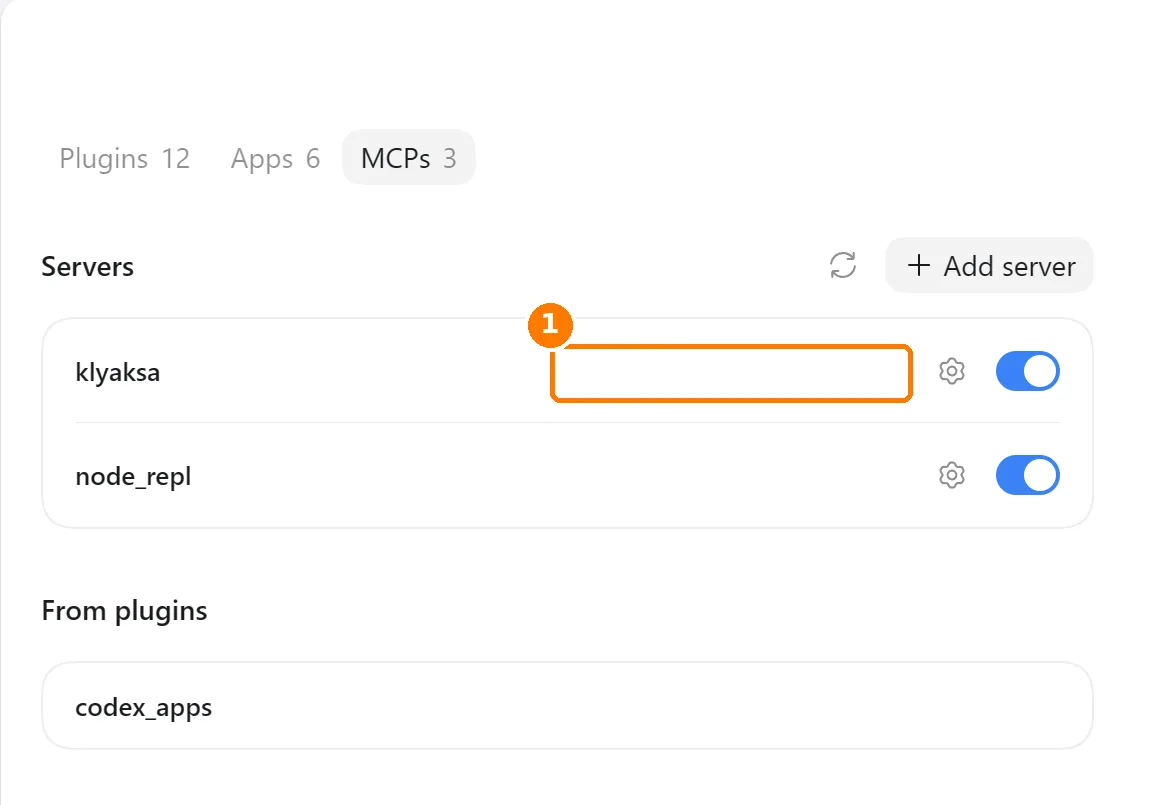
/mcp in the chat — Klyaksa should be on the list.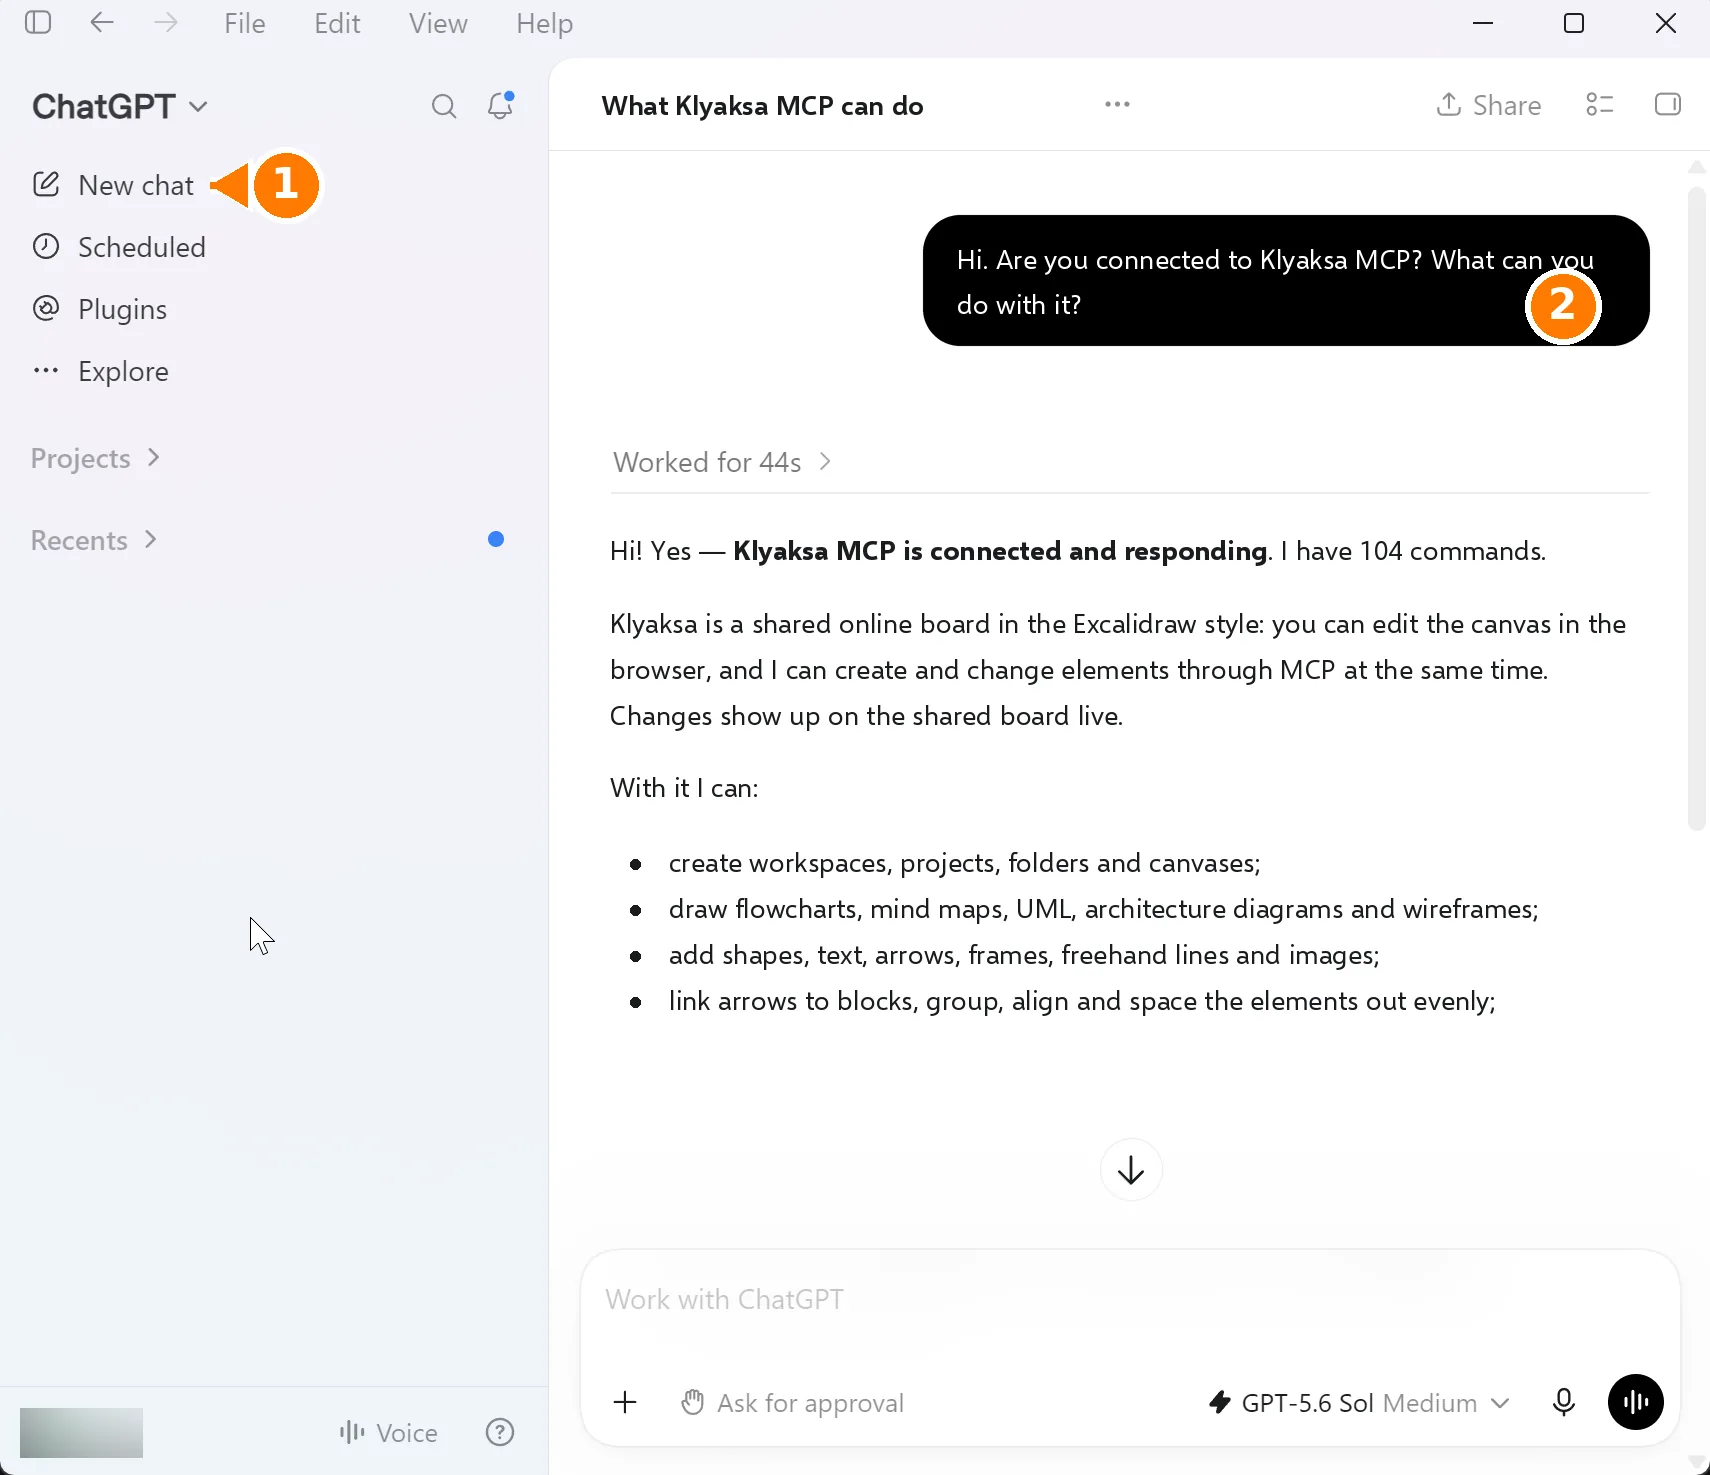
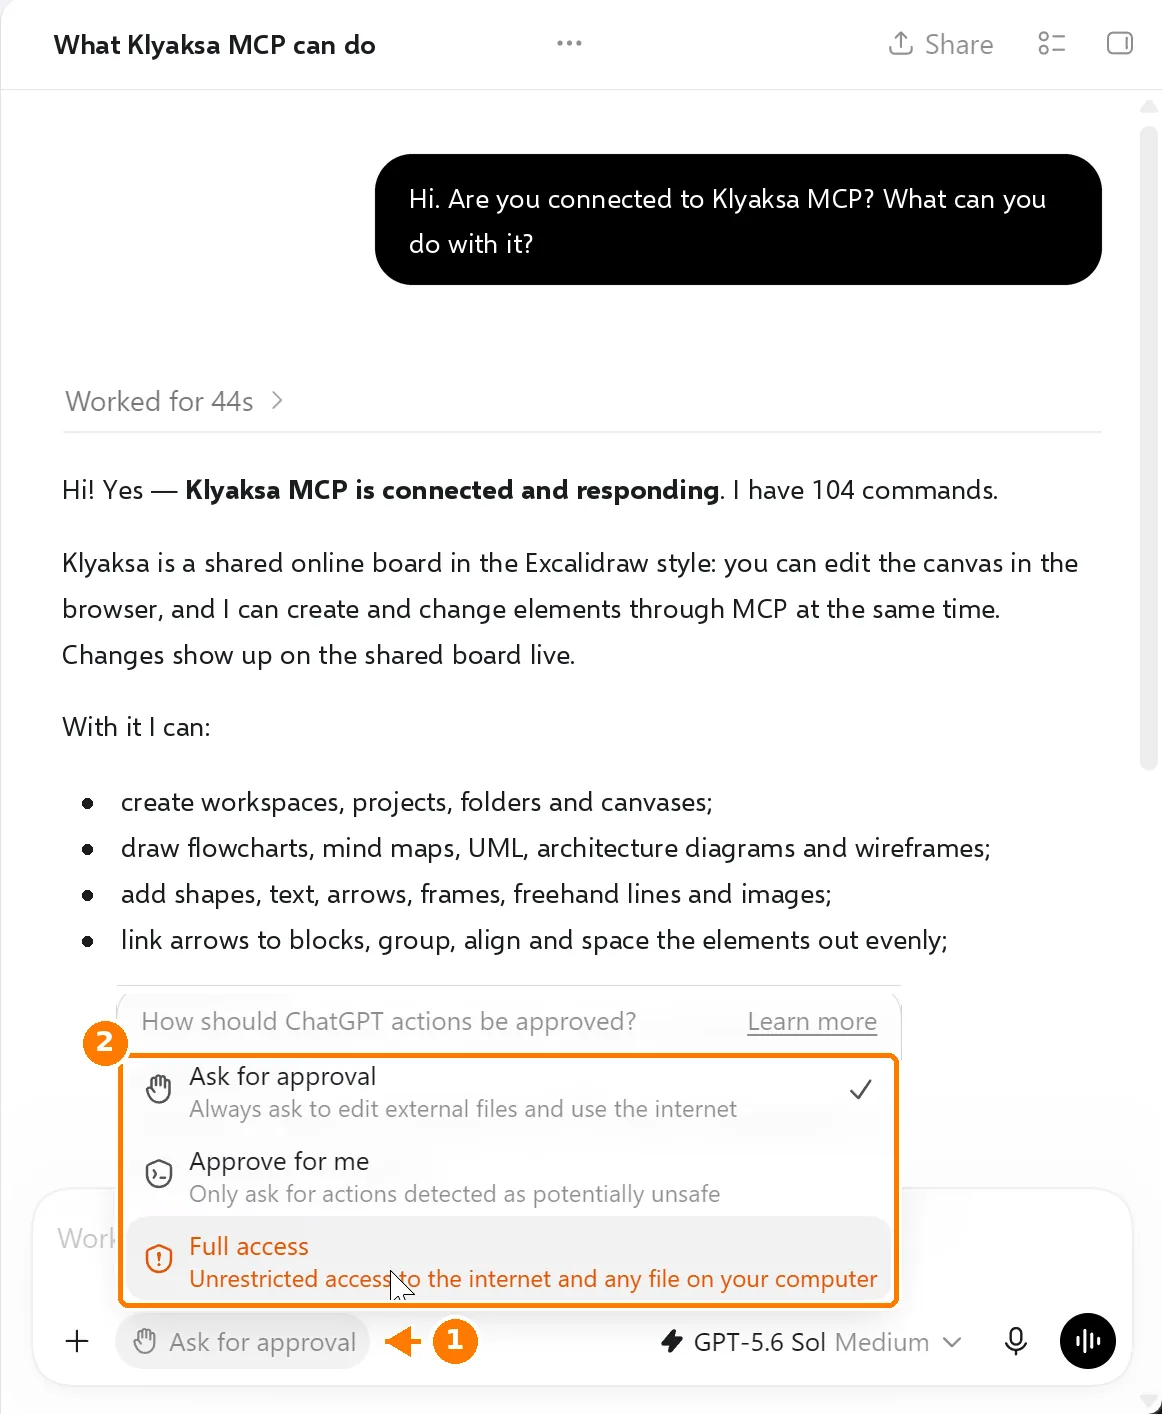
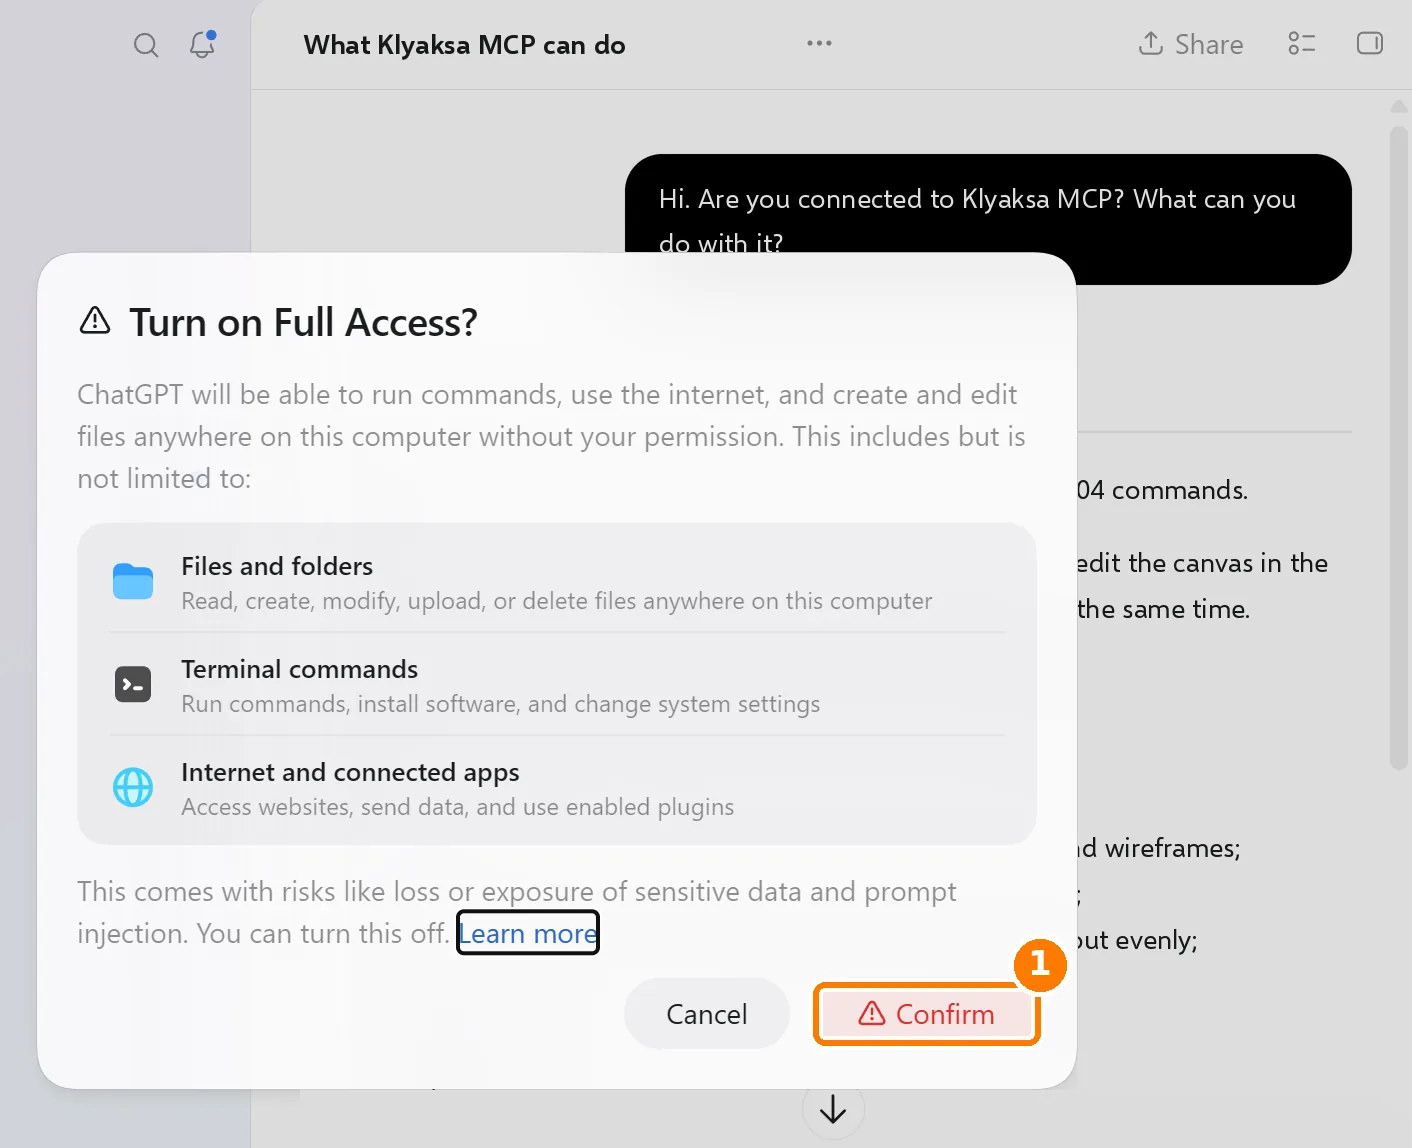
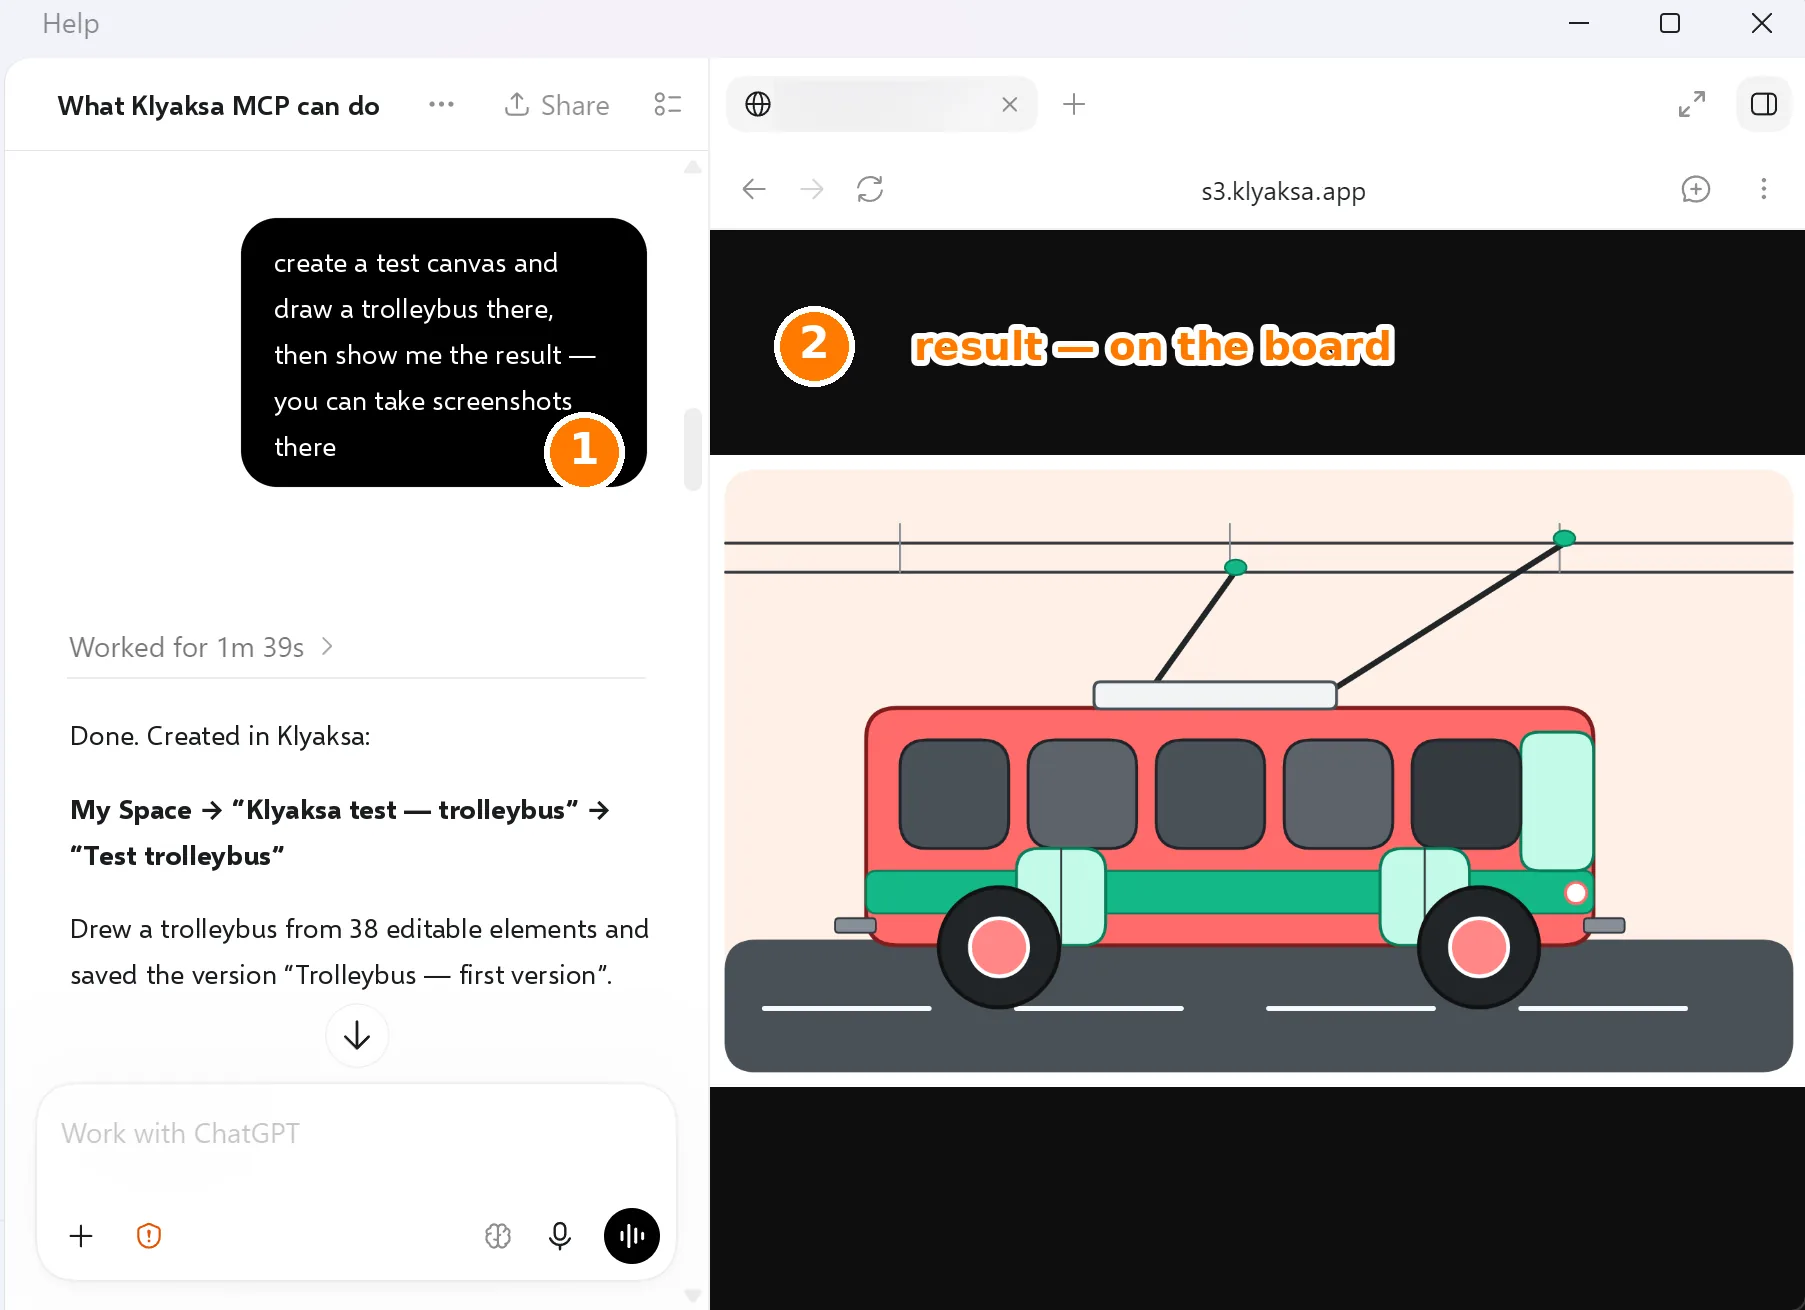
This list is shared with the Codex CLI and the editor extension — connecting here connects them too.
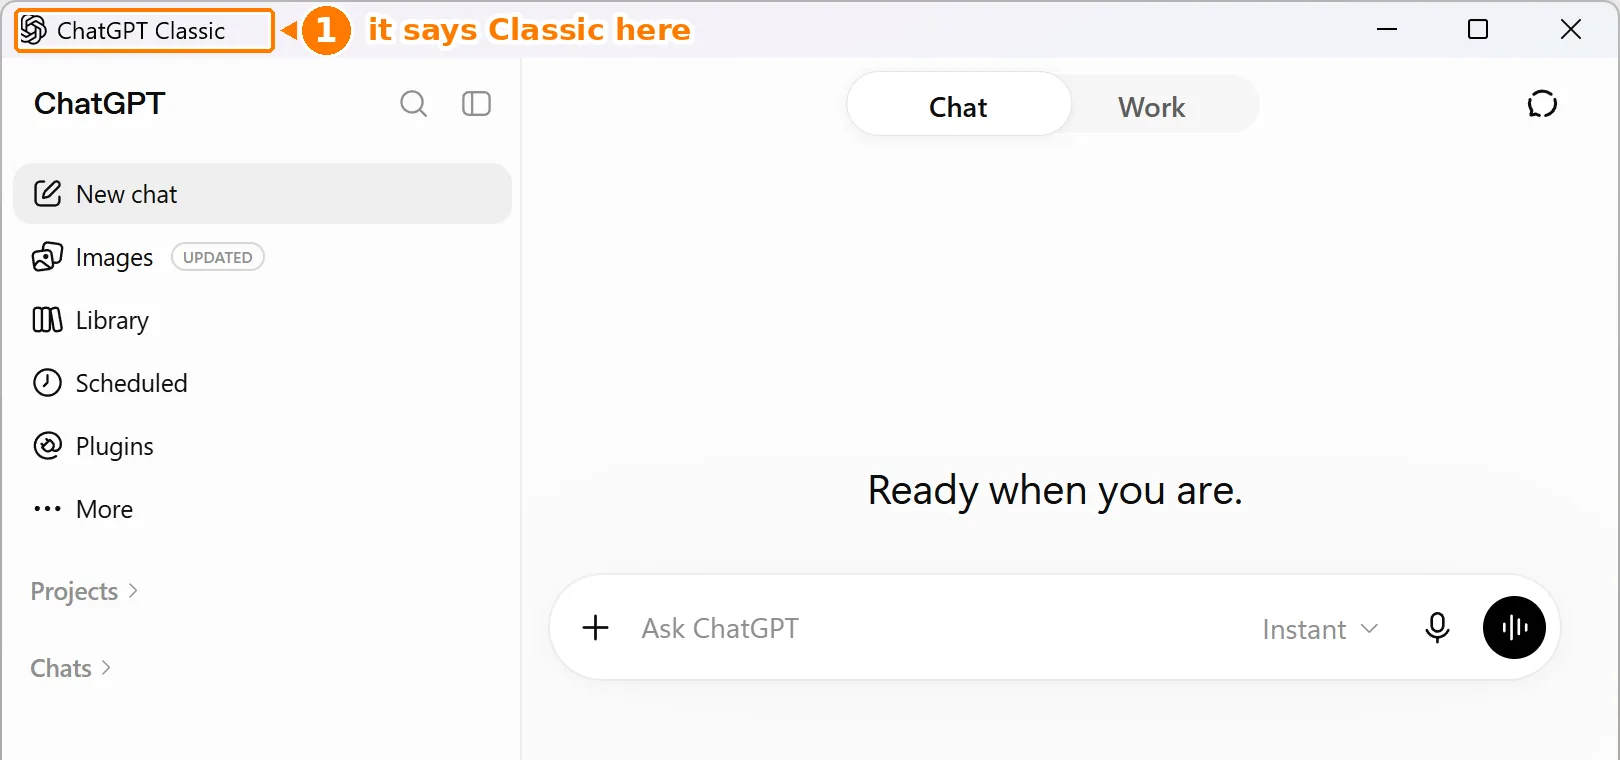
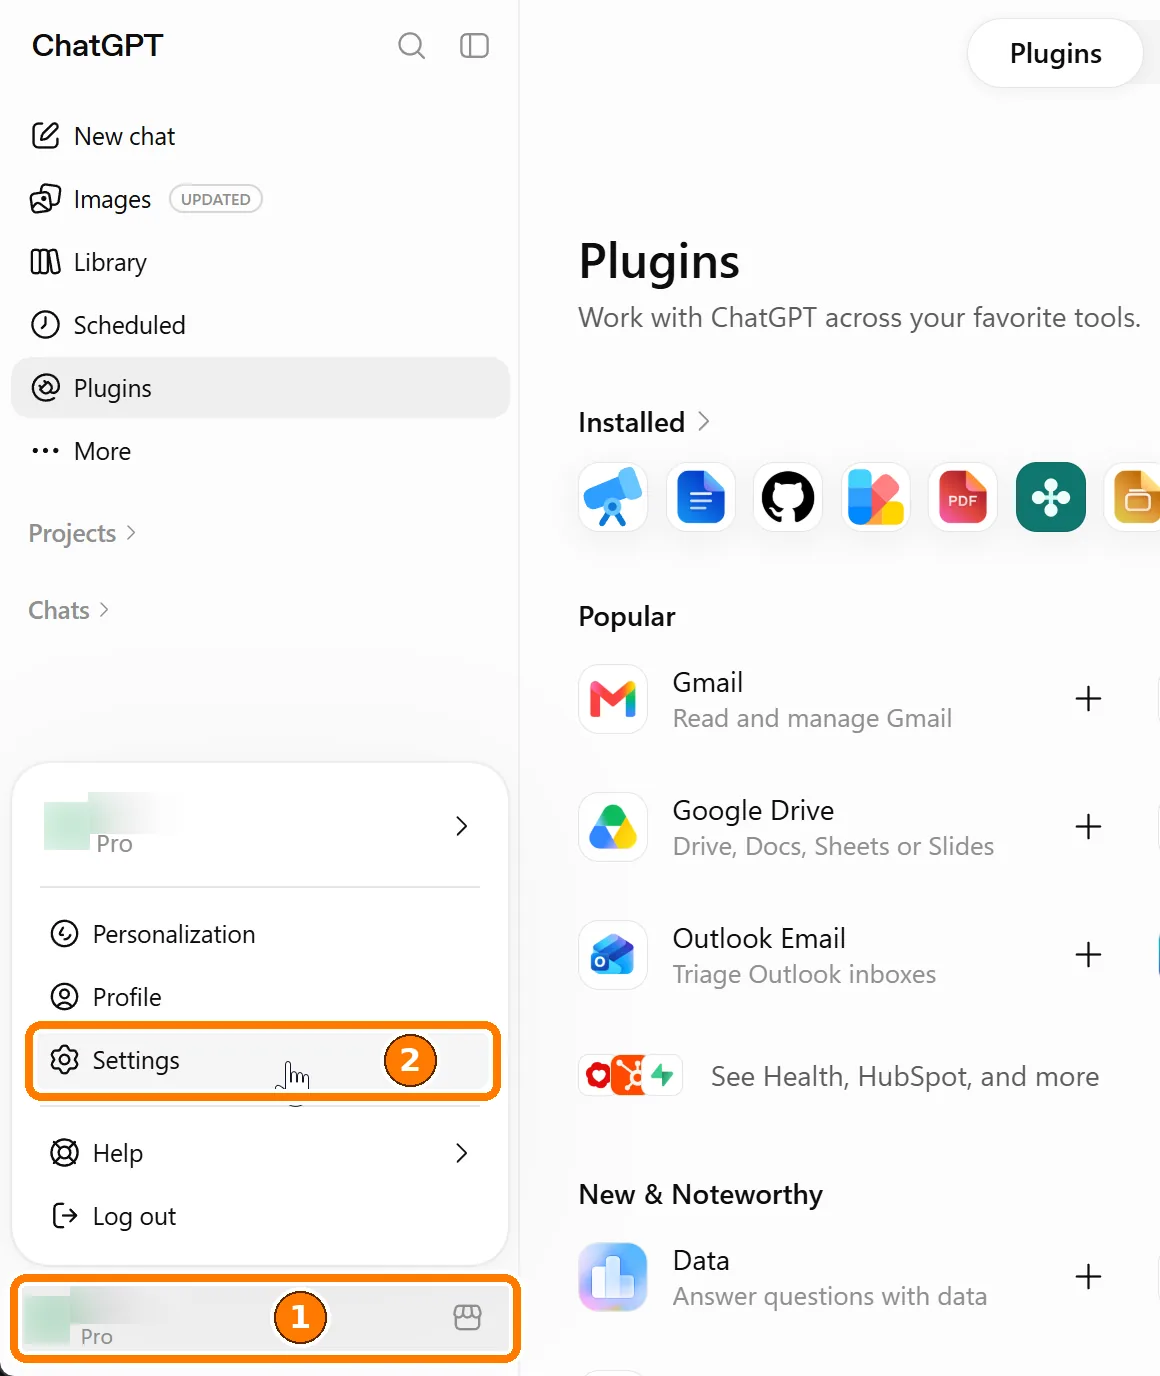
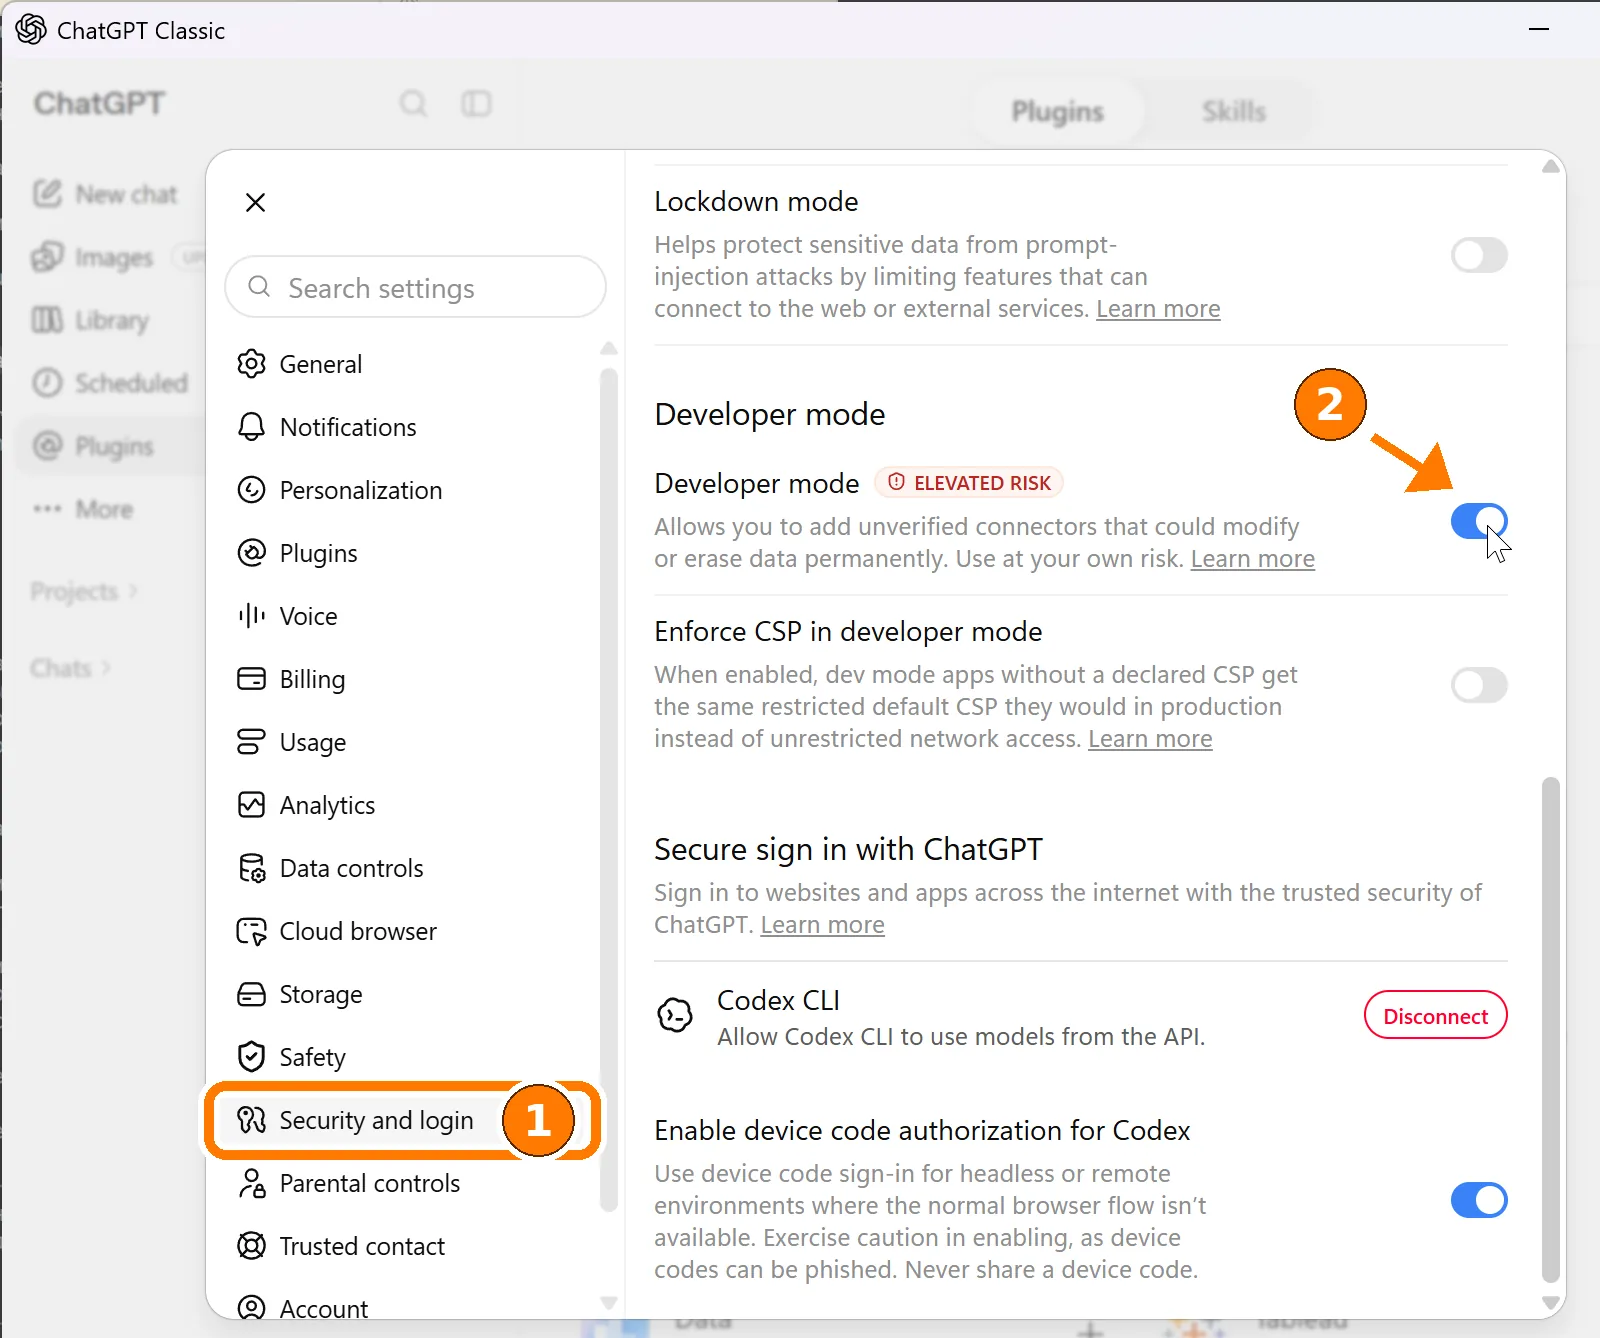
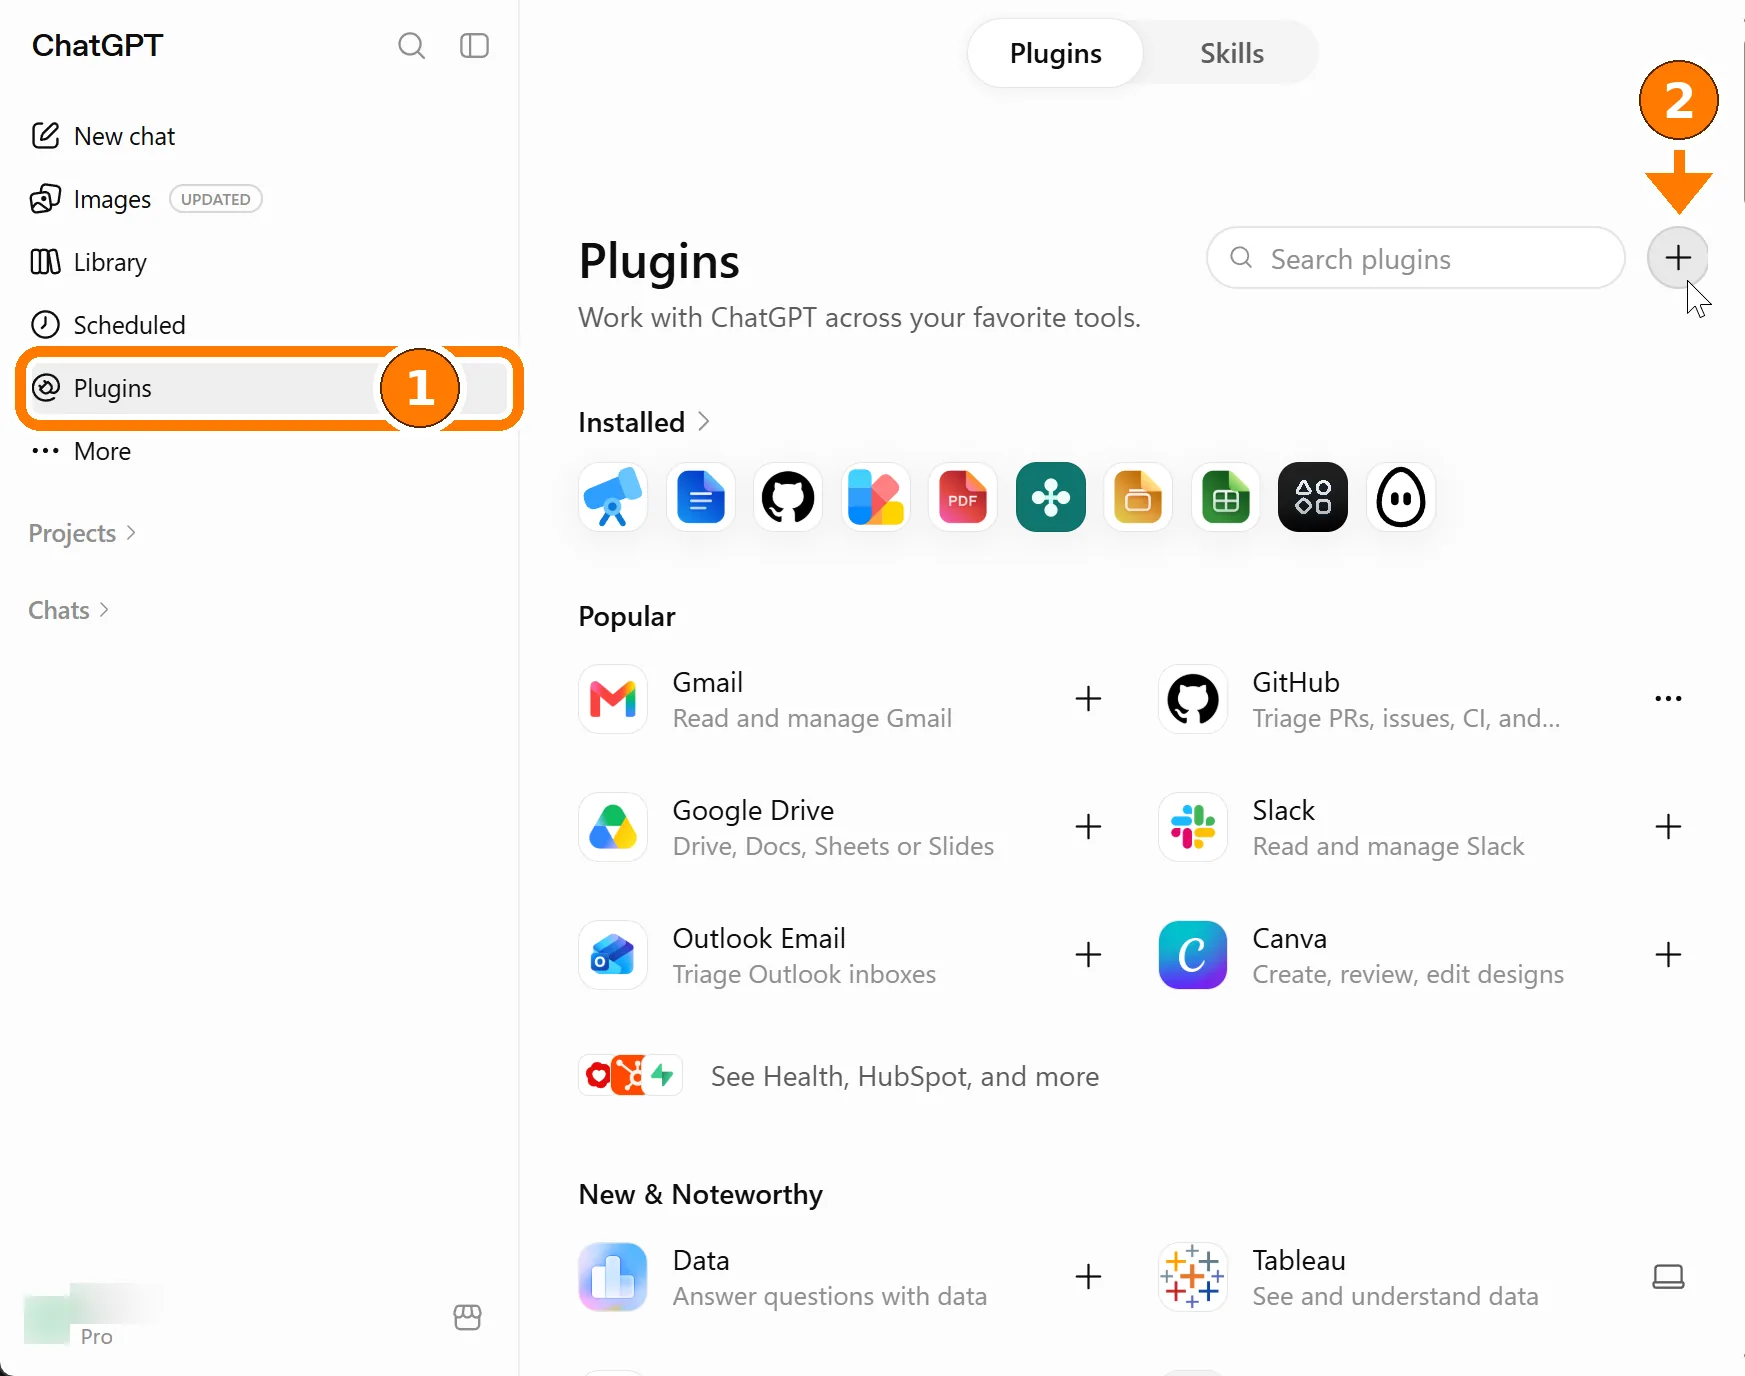
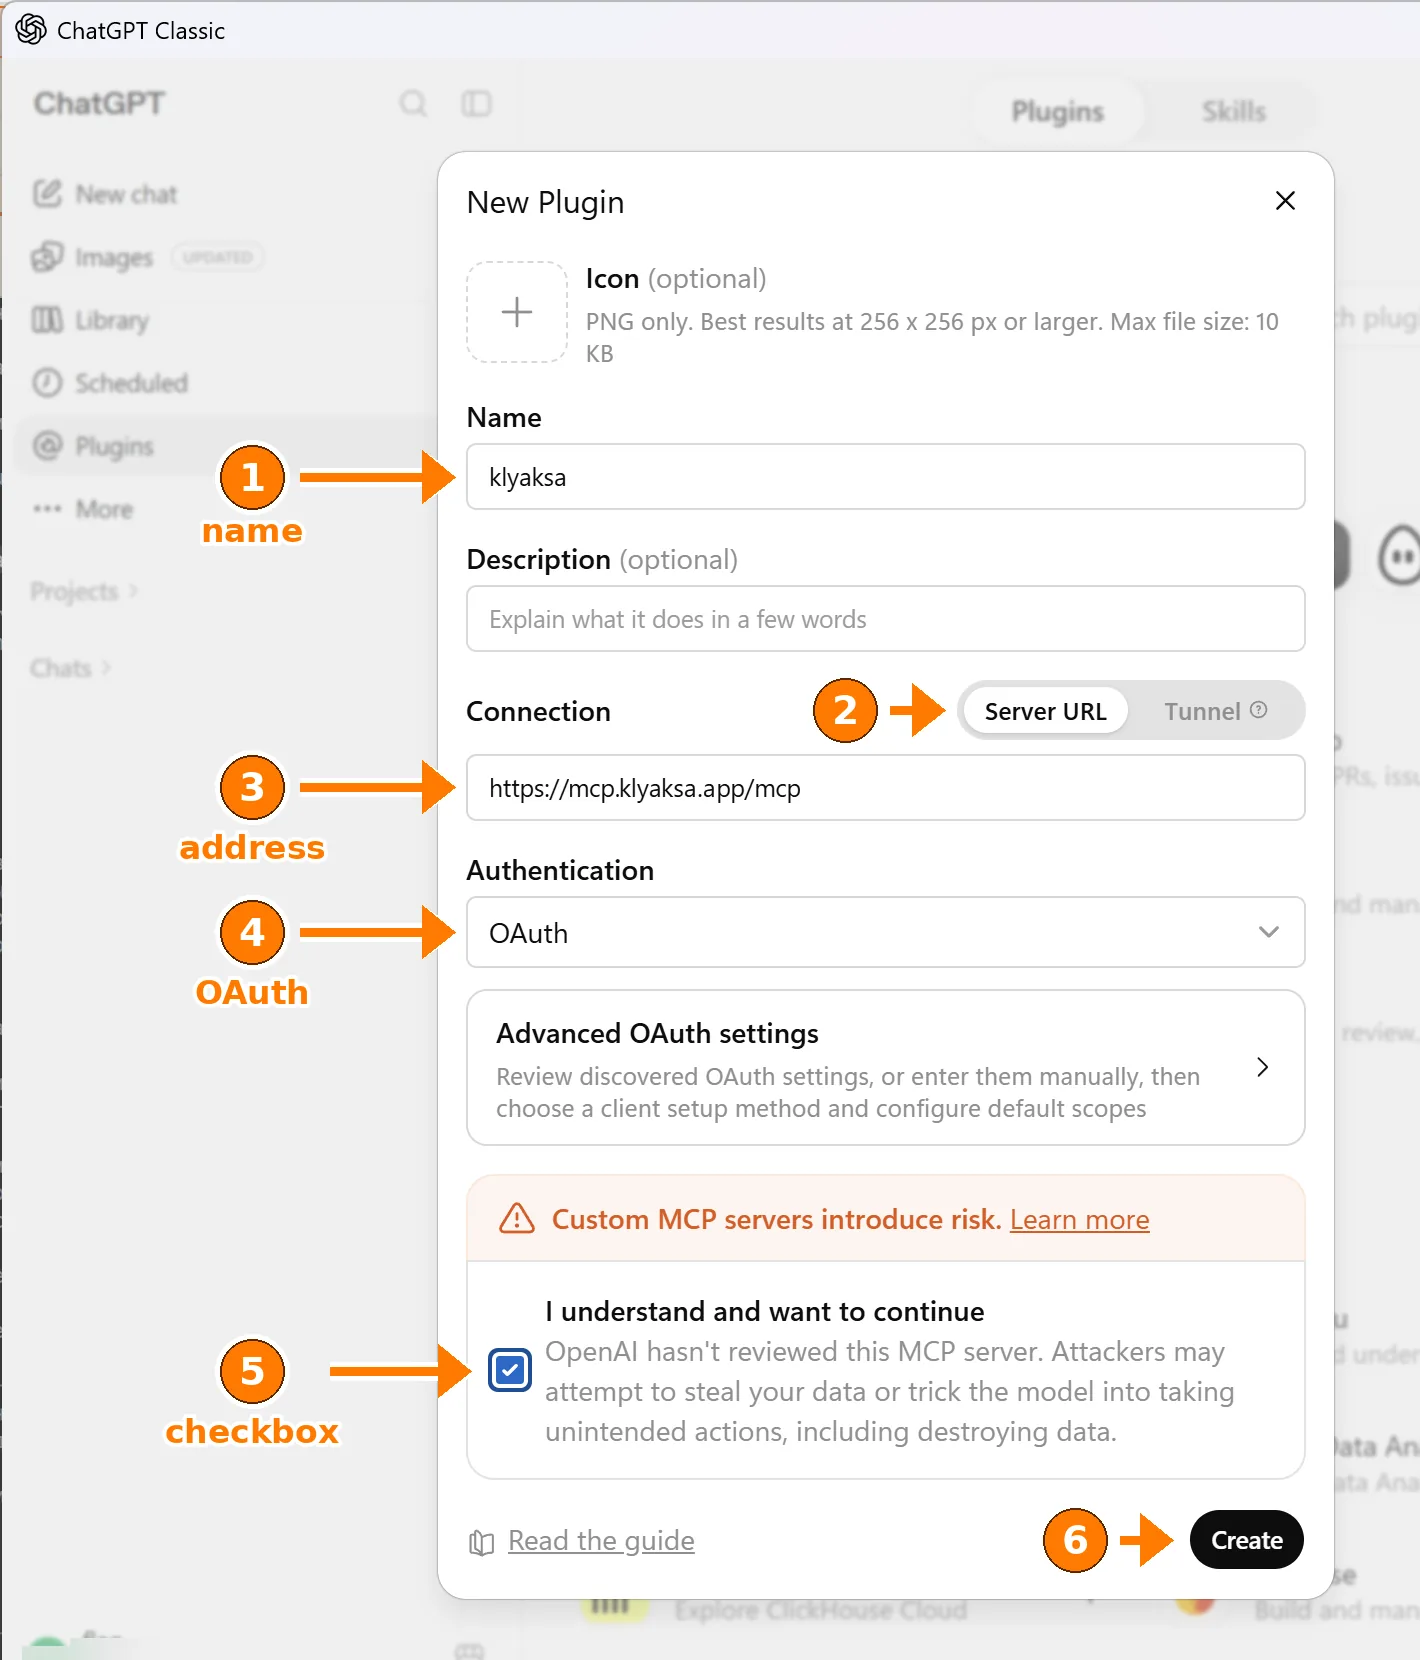
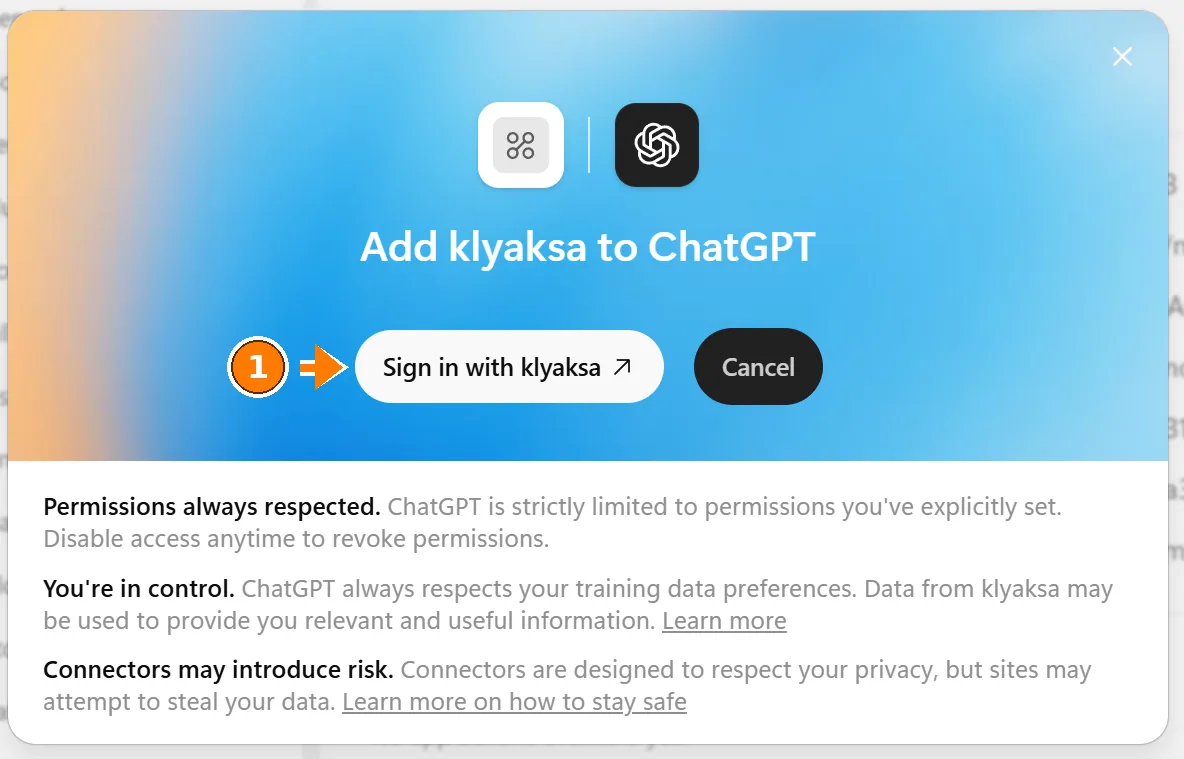
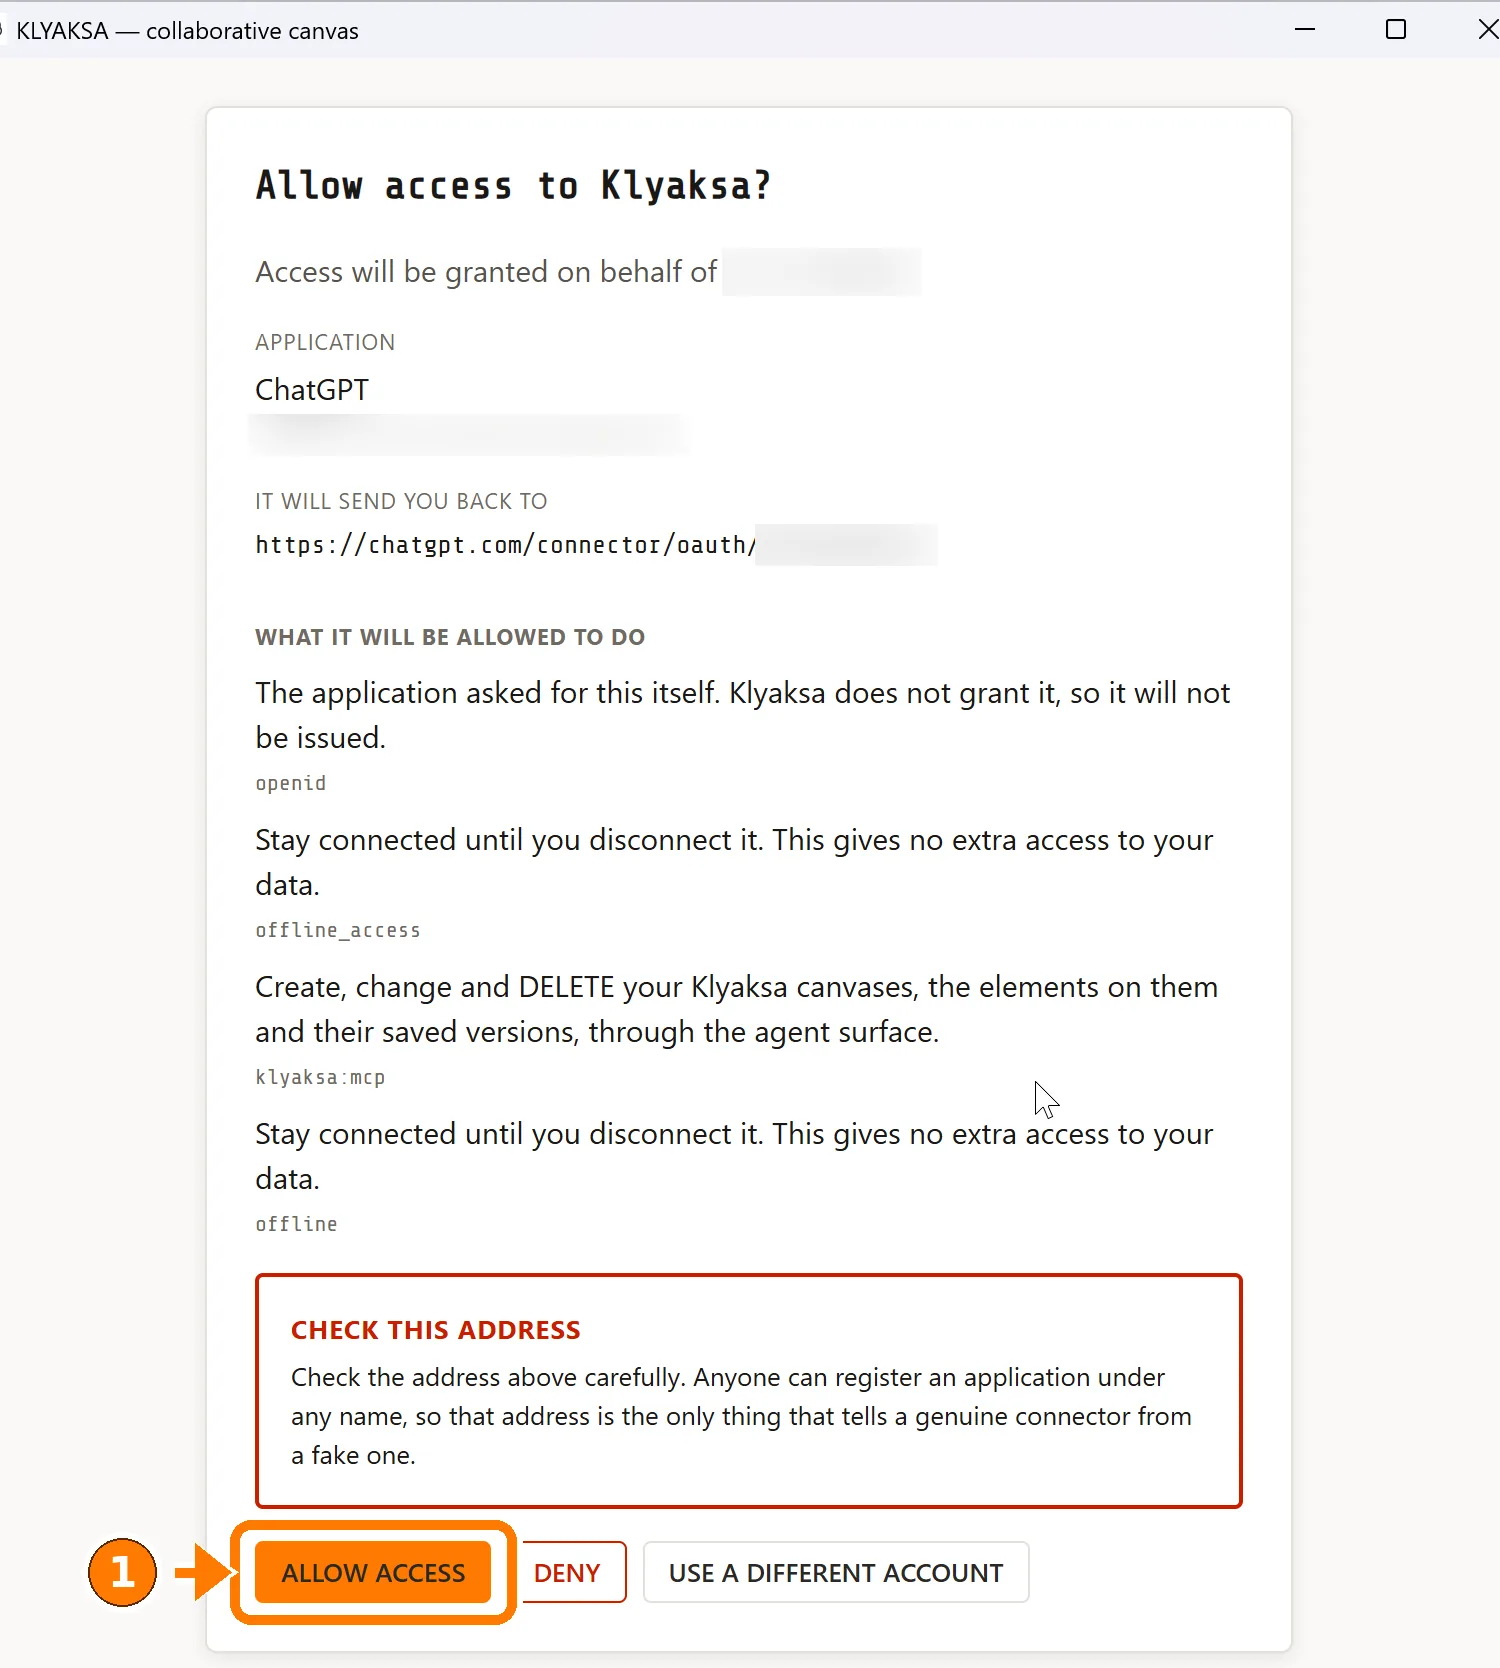
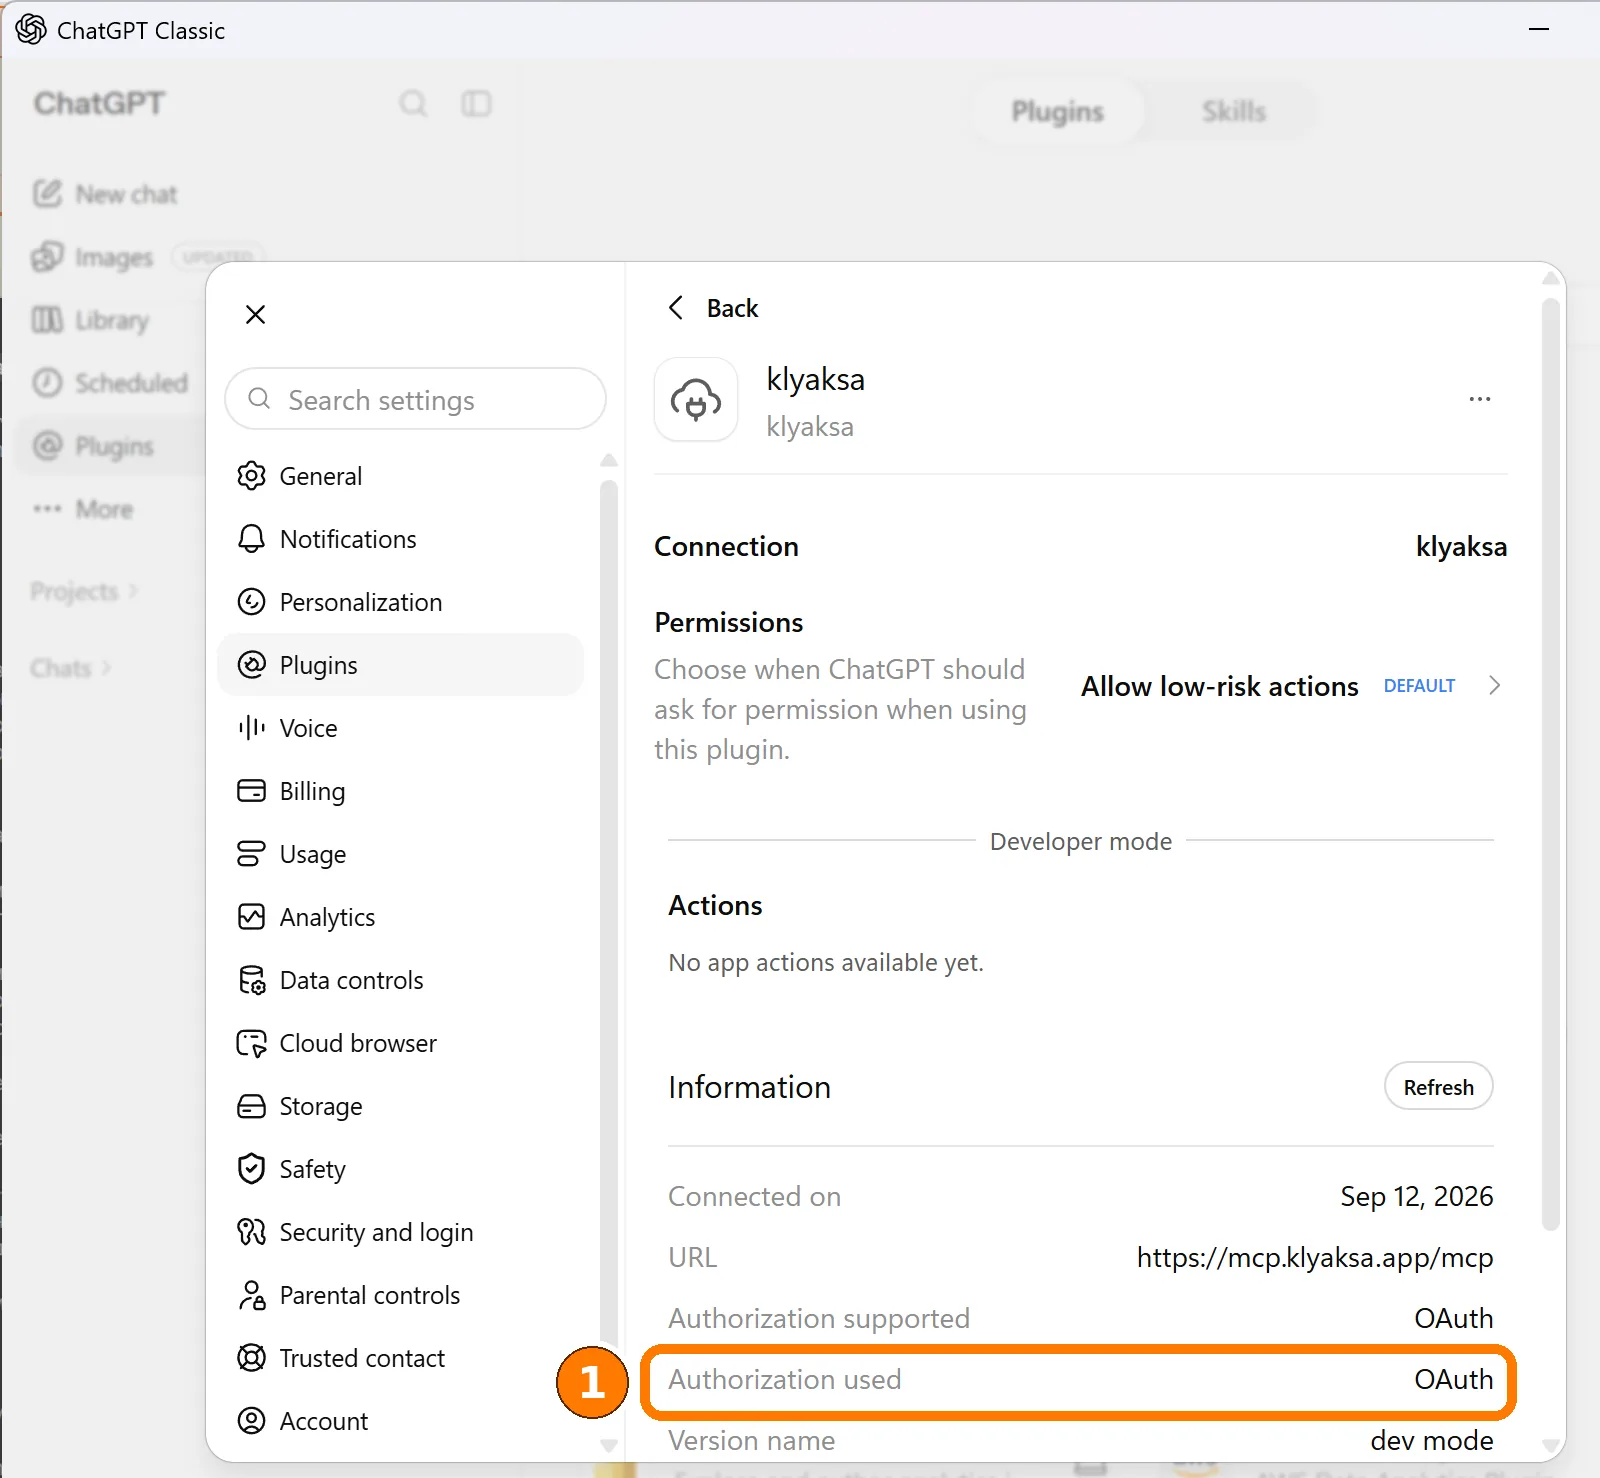
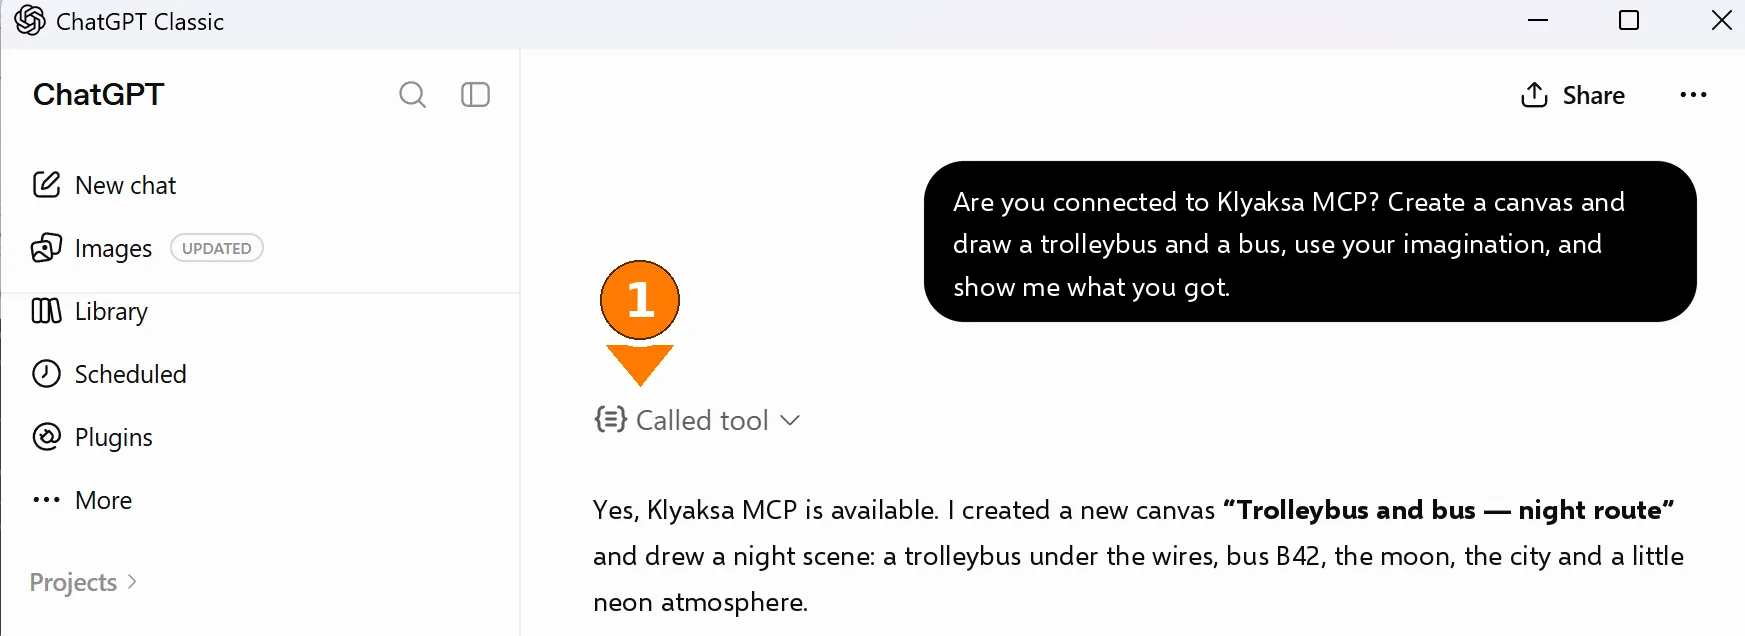
The connection is kept in your account and shows up on chatgpt.com. This is a DIFFERENT place from the MCP list in the new app: a server added there does not appear in ordinary chats, and a connector from the chats does not appear in Codex.
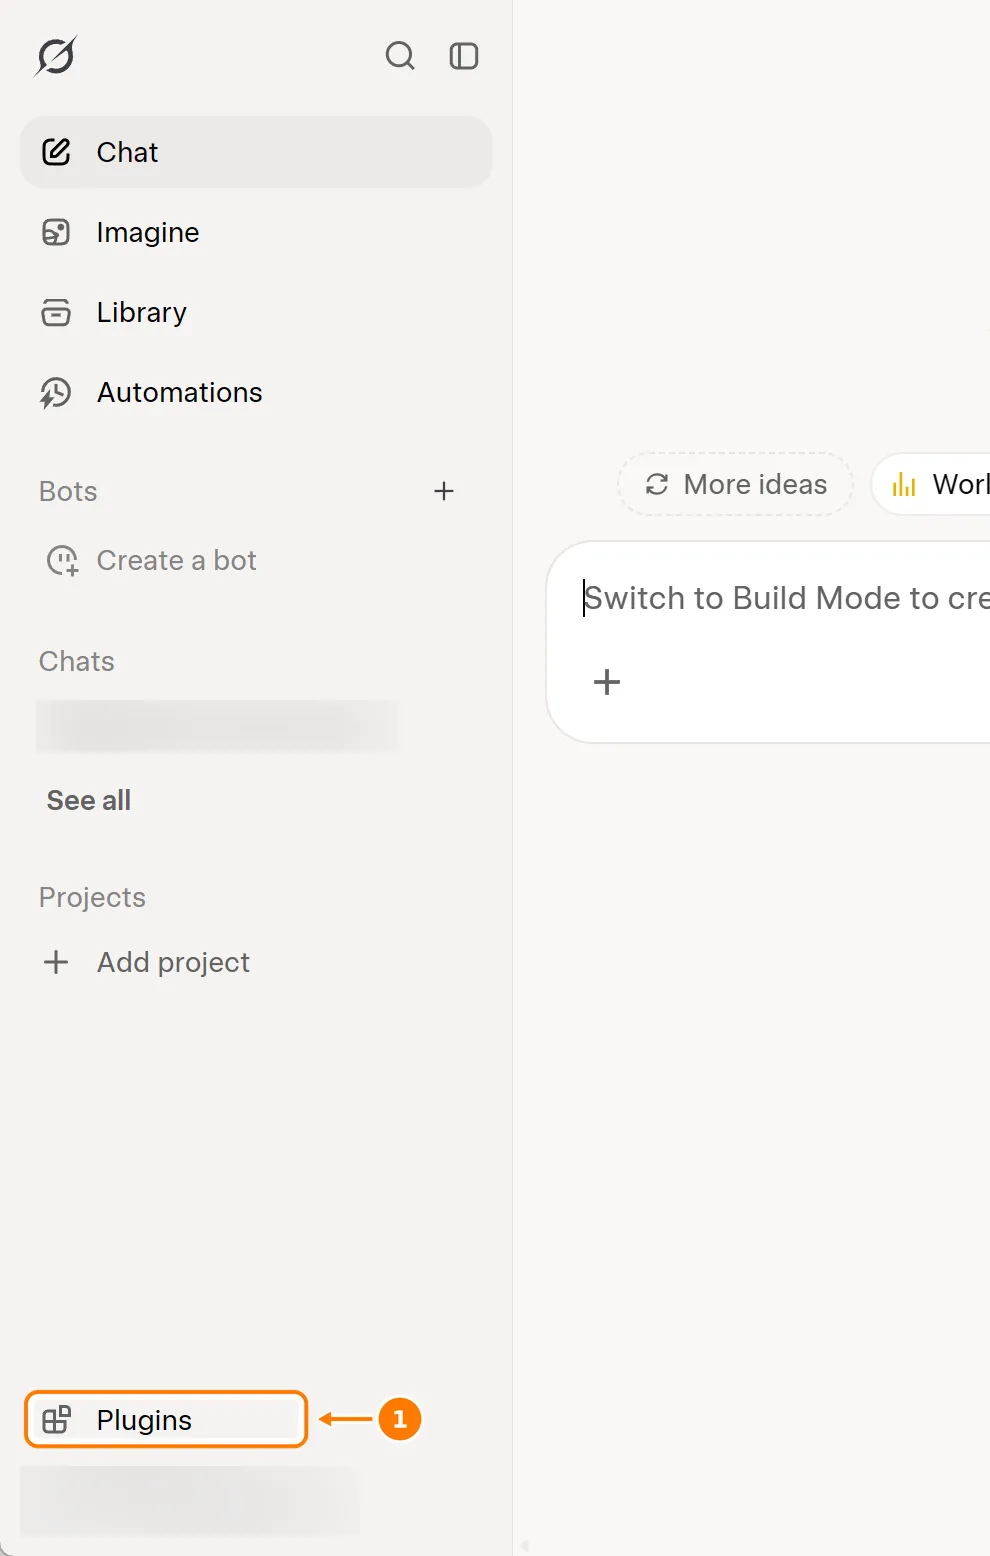
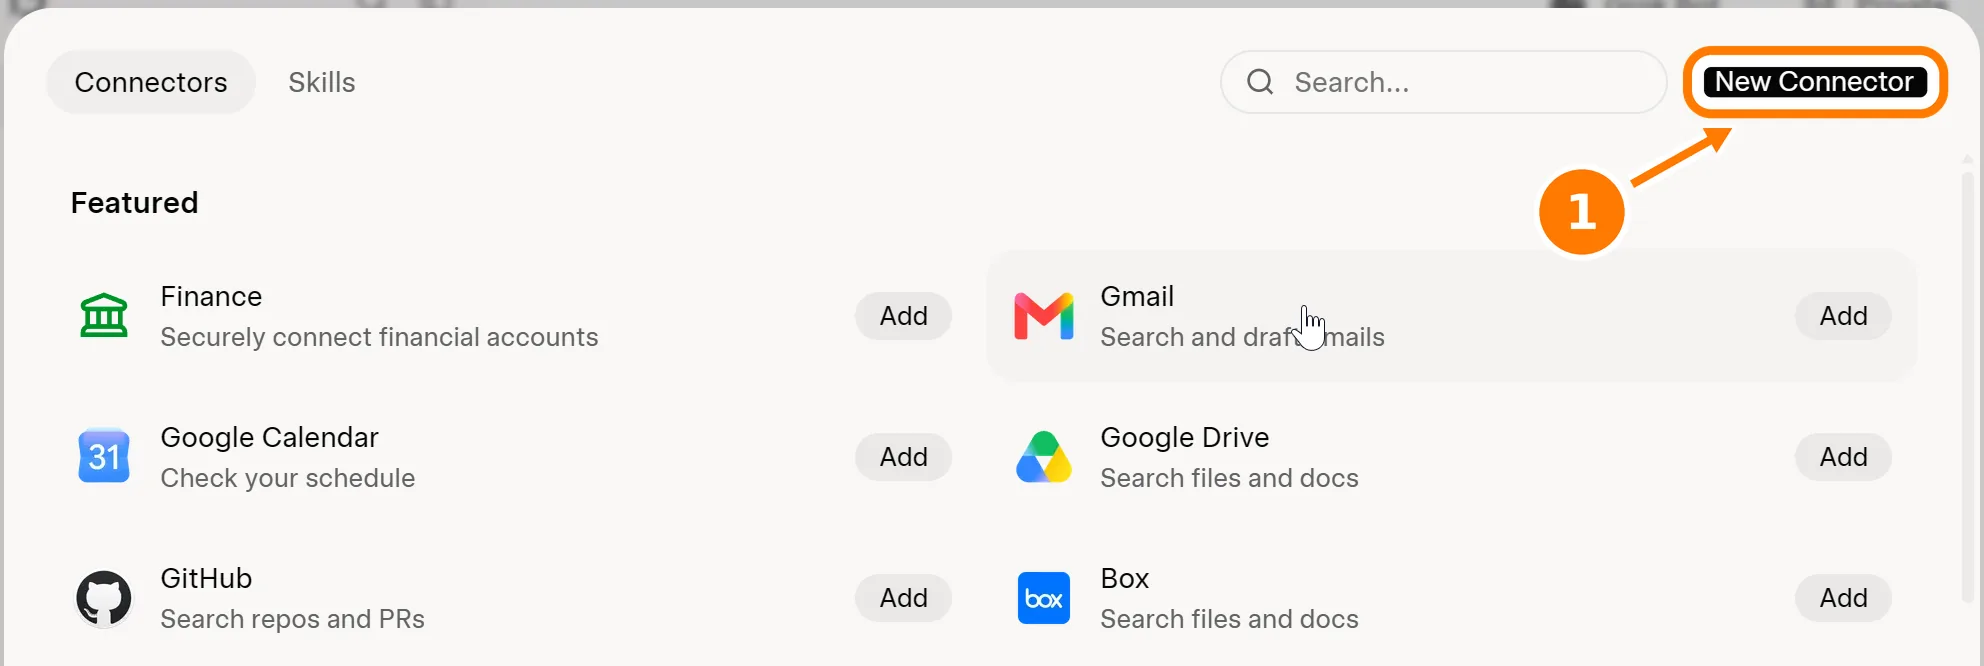
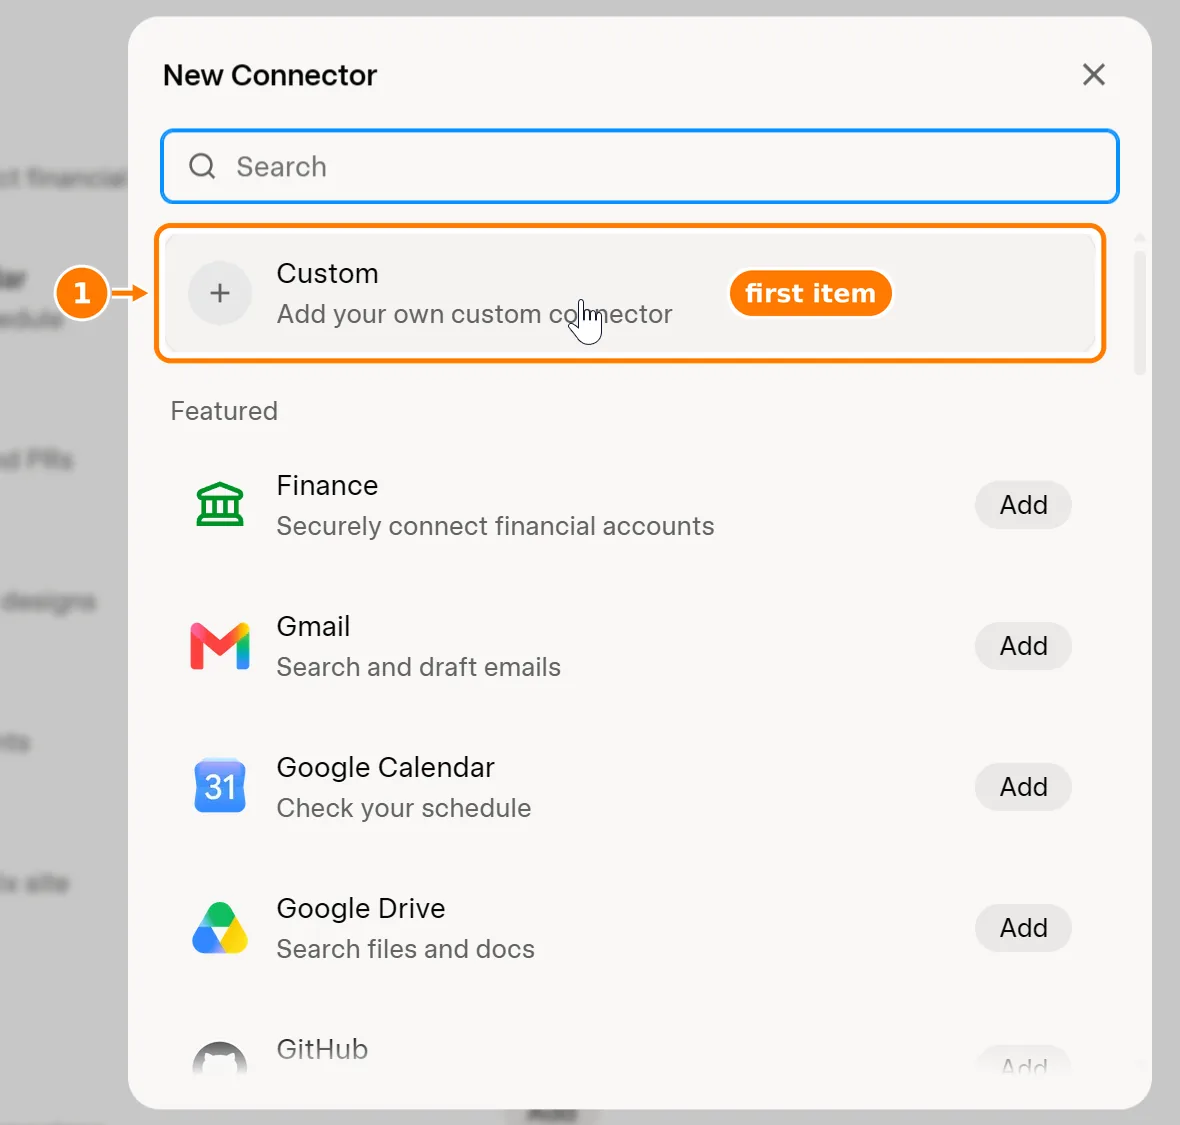
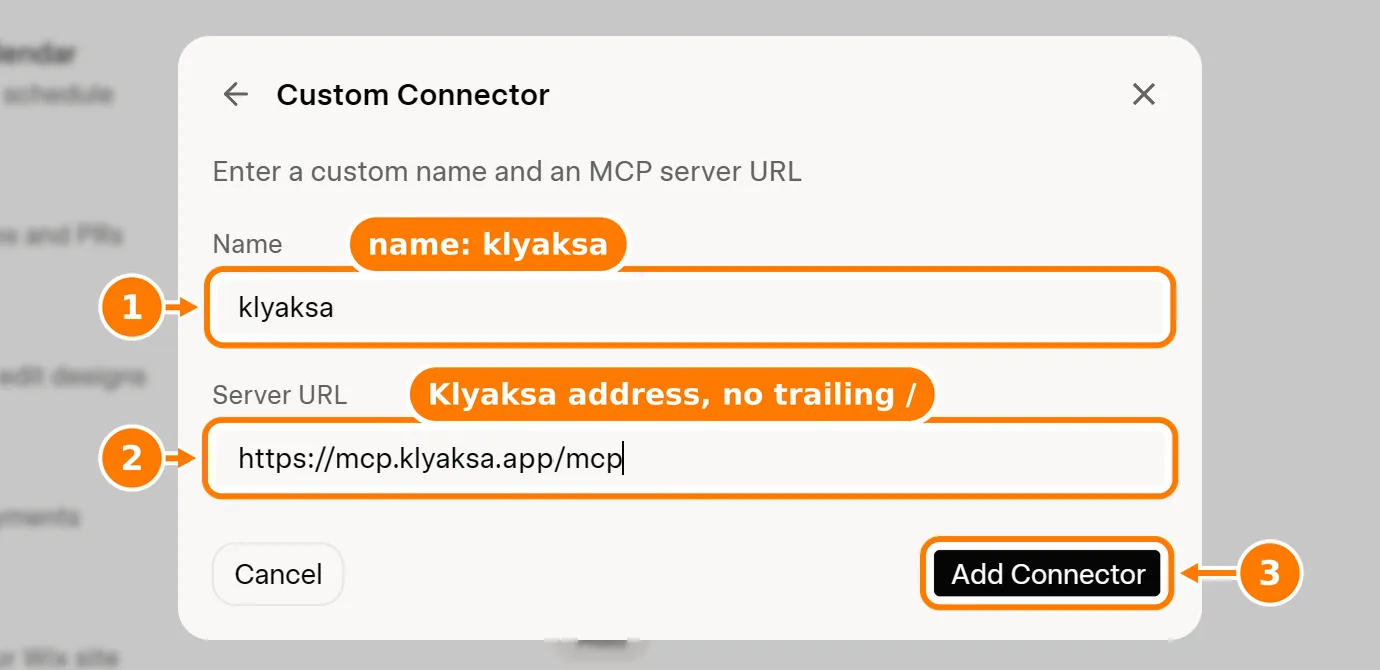
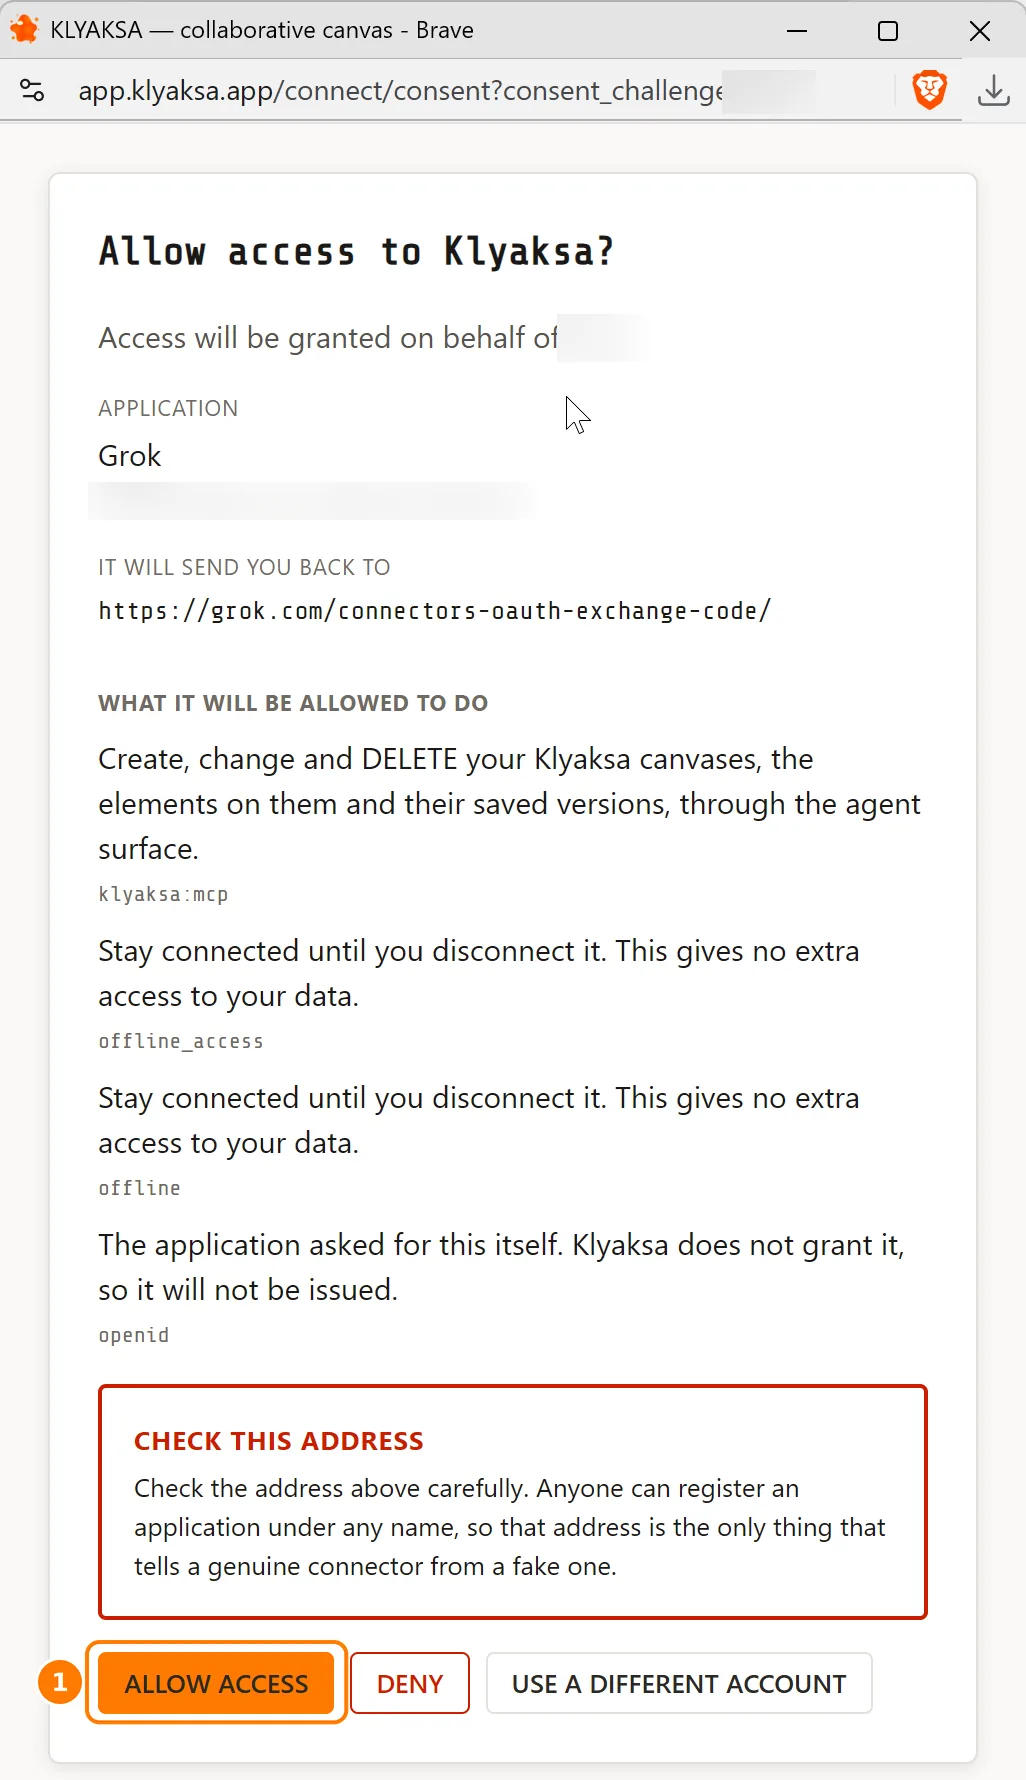
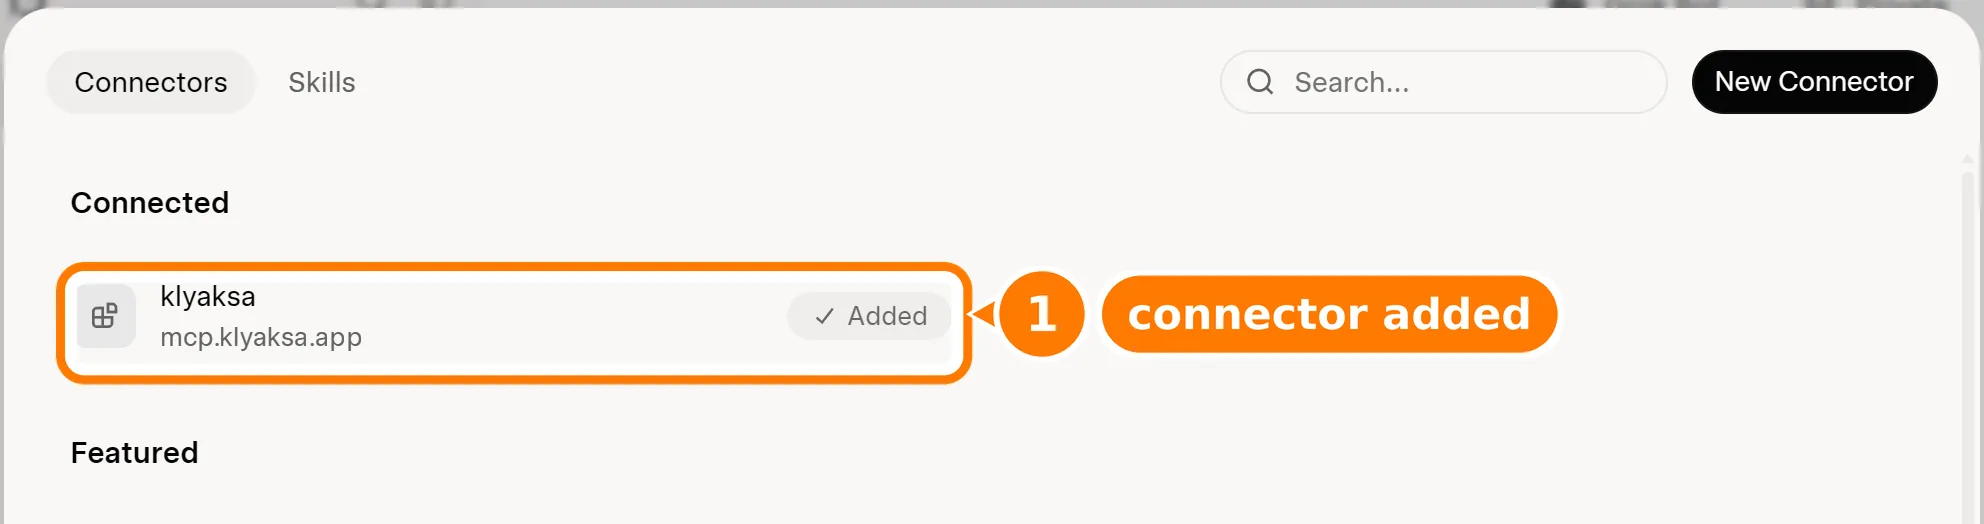
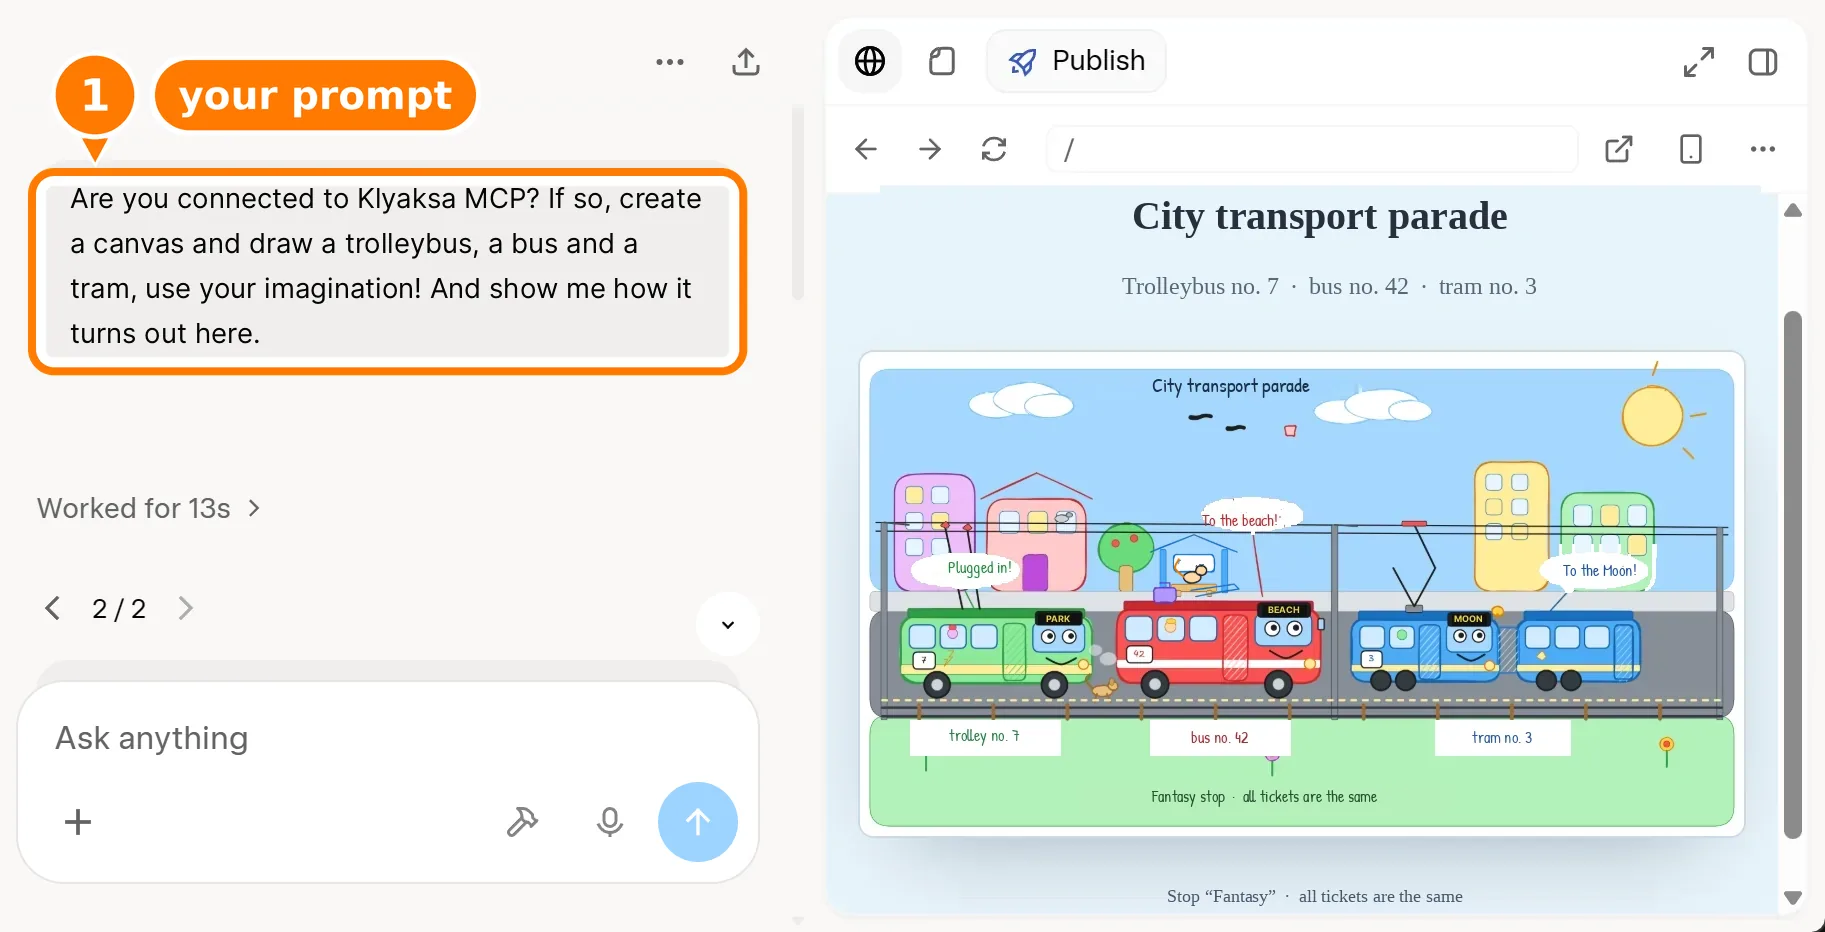
The connection is kept in your Grok account, not on your computer — it is disconnected in the same place, under Plugins.
The app then appears in Klyaksa under AI Agents → Apps and sites → Connected applications, under the name it gave itself. If it is not there — the sign-in did not finish, try again.
cursor) and press CREATE KEY.Lost the key? Create a new one and revoke the old one with the REVOKE button — agents using the old key will lose access.
Below the key is shown as <YOUR_API_KEY> — the app inserts your real key into the config it copies.
File: .mcp.json
{
  "mcpServers": {
    "klyaksa": {
      "type": "http",
      "url": "https://mcp.klyaksa.app/mcp",
      "headers": {
        "X-Api-Key": "<YOUR_API_KEY>"
      }
    }
  }
}File: ~/.codex/config.toml
[mcp_servers.klyaksa]
url = "https://mcp.klyaksa.app/mcp"

[mcp_servers.klyaksa.http_headers]
X-Api-Key = "<YOUR_API_KEY>"
Codex also shares its server list with the ChatGPT app: if you connected Klyaksa in ChatGPT by signing in, Codex already has it (see ChatGPT).
File: ~/.cursor/mcp.json
{
  "mcpServers": {
    "klyaksa": {
      "url": "https://mcp.klyaksa.app/mcp",
      "headers": {
        "X-Api-Key": "<YOUR_API_KEY>"
      }
    }
  }
}File: ~/.cline/mcp.json
{
  "mcpServers": {
    "klyaksa": {
      "type": "streamableHttp",
      "url": "https://mcp.klyaksa.app/mcp",
      "headers": {
        "X-Api-Key": "<YOUR_API_KEY>"
      },
      "disabled": false,
      "autoApprove": []
    }
  }
}File: .vscode/mcp.json
{
  "servers": {
    "klyaksa": {
      "type": "http",
      "url": "https://mcp.klyaksa.app/mcp",
      "headers": {
        "X-Api-Key": "<YOUR_API_KEY>"
      }
    }
  }
}File: ~/.kimi-code/mcp.json
{
  "mcpServers": {
    "klyaksa": {
      "transport": "http",
      "url": "https://mcp.klyaksa.app/mcp",
      "headers": {
        "X-Api-Key": "<YOUR_API_KEY>"
      }
    }
  }
}File: ~/.grok/config.toml
[mcp_servers.klyaksa]
url = "https://mcp.klyaksa.app/mcp"
enabled = true

[mcp_servers.klyaksa.headers]
X-Api-Key = "<YOUR_API_KEY>"File: mcp.json
{
  "mcpServers": {
    "klyaksa": {
      "command": "npx",
      "args": [
        "mcp-remote",
        "https://mcp.klyaksa.app/mcp",
        "--header",
        "X-Api-Key: <YOUR_API_KEY>"
      ]
    }
  }
}
For clients that support only local (stdio) servers — the npx mcp-remote bridge. The named agents above support the remote MCP natively.
Yes, Klyaksa is free — connecting agents included. For large teams, separate plans may appear in the future. See also the Terms of Use.
Data is processed on servers in Europe. All of your content remains yours. Details are in the Privacy Policy.
Yes, with versions. Before a big task, save a version — in the editor or by asking the agent to do it — and roll back to it in one click if you don’t like the result. Before a rollback the current state is saved automatically, so the rollback can be undone too. The agent’s edits do not save versions by themselves.
Exactly what you can: it works on your behalf, sees the workspaces and projects available to you and can do what your role allows. Account settings and API keys are not available to it.
An app connected by sign-in: AI Agents → Apps and sites → Connected applications → REVOKE. It will not be able to renew access; a token it already has keeps working for up to 15 more minutes. An agent with a key: revoke the key on the CLI and editors tab. In Claude and Grok the connector can also be removed in their own settings.
Any MCP client that can connect to a remote server. This page has step-by-step instructions for the ones the Klyaksa app has instructions for; for anything else, see Another app or Generic (mcp-remote).
leave your own blot
No email, no password. If you have been here before, your own board opens.